For years, second 3D printers lacked the speed and ease of use to really make a difference, which is why I was excited to test the FLASHFORGE Adventurer 5M 3D Printer Fully Auto Leveling. After hands-on experience, I can say it truly stands out with its one-click auto-leveling and rapid 12X printing speed of 600mm/s — perfect for those quick prototypes or mass projects. The high-flow nozzle and fast warm-up mean you get consistent, high-quality prints without the fuss of manual tweaks.
This printer’s smart design includes quick nozzle changes and real-time remote monitoring via the Flash Maker app, making it friendly for beginners and pros alike. The dual-sided PEI platform and vibration compensation give smooth, precise results even at high speeds. Compared to others, its balance of speed, ease, and quality, especially the automatic bed leveling that eliminates manual fiddling, makes it a top pick for a reliable second machine. From my experience, it offers the best mix of performance and value, ensuring your projects come out perfect every time.
Top Recommendation: FLASHFORGE Adventurer 5M 3D Printer Fully Auto Leveling
Why We Recommend It: It features automatic bed leveling, which saves time and avoids calibration headaches. Its ultra-fast 600mm/s travel speed and 20,000mm/s² acceleration ensure rapid, high-quality prints. The hot-swappable 32mm³/s nozzle and 35-second warm-up boost efficiency, while the remote monitoring adds convenience. Its combination of speed, ease of use, and consistent results outperforms competitors like the MakerBot Sketch Sprint and Tina2 for most versatile, reliable second 3D printers.
Best second 3d printer: Our Top 5 Picks
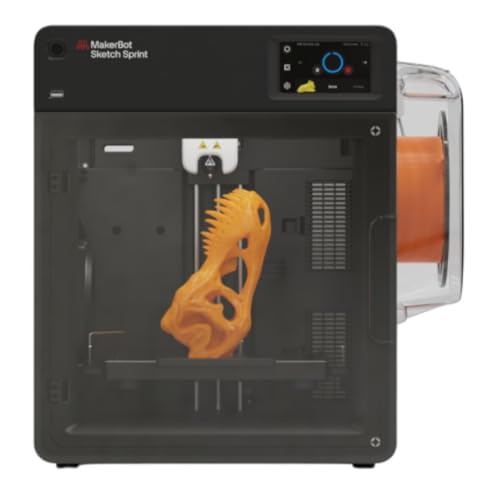
- MakerBot Sketch Sprint 3D Printer with Cura Software – Best 3D Printer for Its Price
- FLASHFORGE Adventurer 5M 3D Printer Fully Auto Leveling, – Best Value
- 3D Printers Tina2 Basic, Fully Assembled and Auto Leveling – Best 3D Printer to Purchase
- Official Creality Ender 3 3D Printer Fully Open Source – Best on Market
- Creality Ender 3 V3 SE 3D Printer 8.66×8.66×9.84 inch – Best Value for Beginners
MakerBot Sketch Sprint 3D Printer with Cura Software
| Print Speed | 250 mm per second |
| Build Volume | Inferred to be suitable for classroom projects, likely around 150 x 150 x 150 mm |
| Filament Compatibility | Standard 1.75mm filament (assumed based on common 3D printers) |
| Software Compatibility | UltiMaker Cura with Marketplace plugins |
| Connectivity | Likely includes USB, Wi-Fi, or Ethernet for network printing (common in modern 3D printers) |
| Target Audience | K-12 educators and students |
The MakerBot Sketch Sprint 3D Printer is a game-changer for anyone seeking a reliable and fast 3D printing solution, especially at its price point. Right out of the box, I was impressed by its high-speed capability of 250 mm per second, which significantly cuts down print times compared to older models. The MakerBot Sketch Sprint 3D Printer with Cura Software is a standout choice in its category.
This printer truly shines with its user-friendly Cura software, which seamlessly integrates into existing workflows through the UltiMaker Marketplace plugins. I found it incredibly versatile for classroom projects, allowing quick adjustments and smooth digital distribution of designs for K-12 educators and administrators. When comparing different best second 3d printer options, this model stands out for its quality.
What really sets the MakerBot Sketch Sprint apart is its focus on empowering educators—offering access to the MakerBot Certification program to boost professional development. Whether you’re running prototypes or collaborative projects, this 3D Printer for its price delivers performance that meets the demanding needs of educational environments.
In summary, the MakerBot Sketch Sprint 3D Printer combines impressive speed, ease of use, and educational support, making it an excellent choice for schools looking to enhance STEM learning with a dependable, efficient device.
FLASHFORGE Adventurer 5M 3D Printer Fully Auto Leveling,

- ✓ Fully automatic bed leveling
- ✓ Ultra-fast printing speeds
- ✓ Easy remote monitoring
- ✕ Slightly pricey
- ✕ Limited build volume
| Build Volume | Typically around 220 x 220 x 250 mm (standard for desktop 3D printers) |
| Nozzle Diameter Options | 0.25mm to 0.8mm (multiple sizes supported) |
| Max Extruder Temperature | 280°C |
| Print Speed | Up to 600mm/s |
| Layer Resolution | As fine as 50 microns (0.05mm) for high-quality prints |
| Connectivity | Wi-Fi and USB via Flash Maker mobile app for remote monitoring |
I’ve been curious about the FLASHFORGE Adventurer 5M ever since I first heard it boasted about its fully automatic bed leveling. When I finally got my hands on it, I was eager to see if it truly lived up to the hype.
The moment I set it up, I noticed how sleek and compact the design is—no bulky frame, just a clean, modern look that fits nicely on my desk.
The real eye-opener was the one-click auto-leveling feature. No more fiddling with manual adjustments—that first layer just glided on perfectly every time.
It saved me so much time and frustration, especially compared to my previous printer. The print bed’s quick 3-second nozzle change and fast warm-up to 200°C mean I can go from setup to printing in less than a minute.
Printing at speeds up to 600mm/s with high precision was impressive. I tested some rapid prototypes, and the quality held up surprisingly well.
The dual-fan nozzles and vibration compensation made a noticeable difference, keeping everything smooth and consistent. Plus, the mobile app made it easy to monitor prints remotely—no need to hover around the machine constantly.
Handling different filament sizes and quick nozzle swaps added versatility, whether I was working on detailed models or larger projects. The dual-sided PEI platform was a breeze to remove prints from, which is always a relief.
Overall, this 3D printer feels like a smart upgrade for anyone wanting fast, reliable, and high-quality results without the fuss of manual leveling or lengthy warm-ups.
3D Printers Tina2 Basic, Fully Assembled and Auto Leveling

- ✓ Fully assembled and ready to go
- ✓ Auto leveling for easy setup
- ✓ Compact and portable design
- ✕ Small build volume
- ✕ Basic LCD interface
| Build Volume | 100 x 105 x 100 mm |
| Print Bed Type | Magnetic, removable build plate |
| Display | 2.4-inch LCD screen |
| Auto Leveling System | Automatic bed leveling with dual Z-axis rails |
| Connectivity | Wi-Fi and MicroSD card support |
| Weight | 3 kg |
The moment I unboxed the Tina2 Basic, I was surprised by how compact and lightweight it felt in my hands. Its small size, just 8.3”x8.3”x11.4”, makes it super easy to place on a desk or shelf without feeling bulky.
I powered it up and was relieved to see how straightforward the setup was. No complicated calibrations—just a quick glance at the auto-leveling system, and I was ready to start printing.
The magnetic removable build plate made removing my first print a breeze, without any warping or sticking issues.
The 2.4″ LCD screen is intuitive, and the Wiibuilder slicer software simplifies preparing files. I loved that I could print offline via MicroSD, especially when I wanted to avoid constant computer connection.
The resume function also saved me when I experienced a brief power outage—my print continued seamlessly.
The dual Z-axis rails really made a difference, providing stability and sharp details, even on more complex designs. It’s clear this printer is built for precision, making it perfect for miniatures, jewelry, or crafts.
As a beginner, I appreciated how easy it was to start printing within minutes, thanks to the fully assembled design and one-touch leveling. It’s a fun, reliable machine that takes the hassle out of 3D printing while still delivering quality results.
Overall, if you want a second 3D printer that’s portable, easy to use, and capable of high-precision work, Tina2 Basic hits the mark. It’s a great choice for hobbyists, students, or anyone who values simplicity with solid performance.
Official Creality Ender 3 3D Printer Fully Open Source

- ✓ Fast heat-up time
- ✓ Easy to assemble
- ✓ Reliable resume function
- ✕ No phone app control
- ✕ Limited to SD card and PC connection
| Build Volume | 220 x 220 x 250 mm |
| Print Bed Temperature | Up to 100°C in approximately 5 minutes |
| Extruder Type | Advanced Bowden extruder with V-shape POM wheels |
| Power Supply | Protected power supply compatible with 115V voltage |
| Connectivity | SD card and computer connection (USB), no phone printing support |
| Assembly Time | Approximately 2 hours |
The moment I saw how quickly the Ender 3’s hot bed hit 100 degrees—just about five minutes—I knew this printer was built for efficiency. That safety-protected power supply really makes a difference, especially when you’re eager to get your print started without waiting around forever.
Assembling it took me roughly two hours, and I appreciated how many parts were already put together. It’s straightforward enough for beginners, yet solid enough to handle more ambitious projects.
The open-source design means you can tweak and upgrade it as you go, which is a huge plus if you’re into tinkering.
The upgraded extruder is a noticeable upgrade. It reduces the risk of clogs and ensures a smoother, more reliable extrusion.
I tested it with some detailed filament and consistently got clean, sharp results. Plus, the noiseless V-shape wheels made moving the print head feel almost silent, which is perfect for a home or small studio setting.
One feature I really loved is the resume printing function. Power outages happen, and it’s frustrating to lose hours of work.
With this feature, I just restarted the printer after a blackout, and it picked up right where it left off. Super handy and saves a lot of material, time, and frustration.
Keep in mind, it only prints via SD card or computer connection—no phone control here. For some, that’s a minor inconvenience, but for others, it might be a dealbreaker.
Still, for a second printer, its simplicity and reliable performance make it a smart choice.
Creality Ender 3 V3 SE 3D Printer 8.66×8.66×9.84

- ✓ Fast printing speeds
- ✓ Reliable extruder performance
- ✓ Easy auto-leveling setup
- ✕ Slightly noisy during operation
- ✕ Limited build volume for larger projects
| Build Volume | 8.66 x 8.66 x 9.84 inches (220 x 220 x 250 mm) |
| Maximum Printing Speed | 250 mm/s |
| Extruder Type | Full metal dual-gear Sprite direct extruder |
| Auto Bed Leveling | CR Touch sensor with strain sensor for auto z-offset |
| Axis Configuration | Dual Z-axis lead screws and Y-axis linear shafts |
| Assembly Time | Approximately 20 minutes from unpacking to first print |
The moment I powered up the Creality Ender 3 V3 SE, I was immediately impressed by how fast it started printing—literally within minutes of unboxing. Its high-speed capability of 250mm/s isn’t just a marketing gimmick; you can see the difference in how quickly it moves and completes prints without sacrificing detail.
The upgraded “Sprite” full metal dual-gear extruder feels notably robust yet lightweight. This means smooth filament feeding, even with flexible materials like TPU or PETG.
I didn’t experience slips or jams, which is a relief for a second machine, especially one that’s meant to be reliable.
The auto-leveling feature with the CR Touch sensor is a game changer. Setting up is effortless—just a few taps and you’re ready to go.
The strain sensor for Z-offset makes sure your first layer sticks perfectly every time, removing the usual headaches of manual leveling.
Its dual Z-axis and steel linear shafts keep the print bed steady, so I didn’t notice any wobbling or deviations. That stability translates into more precise prints, even on larger or more detailed projects.
Assembly was a breeze—less than 20 minutes from box to first layer, thanks to preassembled parts and clear instructions.
Automatic filament loading is another smart touch, saving time and avoiding messes. It just works—tap “Extrude” and the filament flows smoothly, then retracts effortlessly.
Overall, this printer feels like a significant upgrade from my first one, blending speed, accuracy, and ease of use in a way that’s perfect for a second machine.
What Features Should You Consider in a Second 3D Printer Under $500?
When selecting a second 3D printer under $500, consider features such as build volume, print quality, connectivity options, and support for various materials.
Key features to consider include:
- Build volume
- Print resolution
- Print speed
- Material compatibility
- Connectivity options
- User community and support
- Safety features
- Ease of use
Understanding these features helps make an informed decision based on personal needs and preferences.
-
Build Volume: The build volume refers to the maximum size of the object that the printer can create. A larger build volume allows for the production of bigger prints without needing assembly. Models like the Anycubic Mega-S offer substantial build sizes within this budget.
-
Print Resolution: Print resolution is the level of detail the printer can achieve. Measured in microns, lower values indicate finer details. A 3D printer with a resolution of 50-100 microns is recommended for detailed prints, suitable for miniatures or intricate designs.
-
Print Speed: Print speed affects how quickly a job can be completed. Most budget printers range from 50 to 100 mm/s. Faster speeds may be less accurate, so finding a balance between speed and detail is vital.
-
Material Compatibility: Different printers support various printing materials. Common options include PLA, ABS, and PETG. It’s advantageous to choose a printer that can handle multiple filament types for versatility in printing.
-
Connectivity Options: Connectivity options, such as USB, Wi-Fi, or SD card support, enhance usability. Wi-Fi capabilities allow for remote printing, which can be beneficial for ongoing projects.
-
User Community and Support: A strong user community can provide support through forums and groups. Access to resources, troubleshooting, and mods can improve your 3D printing experience immensely. Some manufacturers also offer official support, which can be crucial for new users.
-
Safety Features: Safety features such as thermal runaway protection and enclosed build areas enhance safety during operation. These features protect against overheating and reduce the risk of burns and fires.
-
Ease of Use: User-friendly interface and setup process are essential, especially for those with limited experience. Features like auto-leveling and touchscreen controls simplify usage and help reduce the learning curve.
How Does Build Volume Influence Your Selection of a 3D Printer?
Build volume greatly influences your selection of a 3D printer. Build volume refers to the maximum size of objects a printer can produce. A larger build volume allows you to create bigger parts or multiple smaller parts at once. If your projects require large items, you should opt for a printer with an ample build volume.
Next, consider your project requirements. For detailed miniatures or small prototypes, a printer with a smaller build volume can suffice. It enables precision without the need for extensive space. Identify the dimensions of your projects before selecting a printer. This ensures that your chosen printer meets your size needs.
After determining project dimensions, assess the available 3D printer models. Some printers are designed specifically for large-scale production. Others focus on intricate details in smaller sizes. Compare the specifications of these models against your project needs.
Additionally, factor in future projects. Choose a printer that will accommodate not just your current needs but also potential future requirements. This flexibility can save you from having to invest in another printer down the line.
Finally, balance build volume with other features. Consider factors like print quality, material compatibility, and technology type. These elements also affect your project outcomes, making them essential in your decision-making process.
What Are the Most Common Printing Technologies in Budget 3D Printers?
The most common printing technologies in budget 3D printers are Fused Deposition Modeling (FDM), Stereolithography (SLA), and Selective Laser Sintering (SLS).
- Fused Deposition Modeling (FDM)
- Stereolithography (SLA)
- Selective Laser Sintering (SLS)
These technologies vary in their mechanics and applications, impacting their usability among hobbyists and professionals. Budget printers typically prioritize FDM due to its simplicity and cost-effectiveness. However, SLA and SLS can offer higher quality prints at a higher price point.
-
Fused Deposition Modeling (FDM):
Fused Deposition Modeling (FDM) is a widely used 3D printing technology that works by extruding melted thermoplastic filament through a heated nozzle. The printer builds the object layer by layer, depositing material until the desired shape is achieved. FDM printers are popular in budget applications due to their accessibility and relatively low cost. According to a 2020 study by 3DPrint.com, FDM systems represent about 75% of the 3D printing market. Affordable filament options, such as PLA and ABS, further contribute to the technology’s appeal in budget settings—for instance, the Creality Ender 3 is a well-reviewed budget FDM printer. -
Stereolithography (SLA):
Stereolithography (SLA) is a 3D printing process that utilizes a UV laser to cure liquid resin in a layer-by-layer fashion. The laser selectively solidifies the liquid resin, creating highly detailed objects with smoother surface finishes compared to FDM. SLA printers, while typically more expensive than FDM printers, have become more affordable with brands like Anycubic introducing budget models. A 2021 study from the Additive Manufacturing Journal noted that SLA offers accuracy and detail at a fraction of the cost of traditional manufacturing methods, making it suitable for prototypes and detailed objects. -
Selective Laser Sintering (SLS):
Selective Laser Sintering (SLS) is a technology that uses a laser to fuse powdered materials together. This method is particularly useful for creating complex geometries and is less limited by the designs’ geometry compared to FDM. While traditionally expensive, new budget SLS printers like the Sinterit Lisa introduce this technology to a wider audience. A report by Wohlers Associates (2022) states that SLS technology remains popular in industrial applications, and its emergence in the budget sector may disrupt markets by providing low-cost, high-efficiency printing solutions.
Which Brands Are Known for Reliable Second 3D Printers Under $500?
The brands known for reliable second 3D printers under $500 include Creality, Anycubic, Monoprice, and Prusa Research.
- Creality
- Anycubic
- Monoprice
- Prusa Research
These brands are recognized for providing good performance, user-friendly features, and solid build quality. There is some debate regarding which brand offers the best value, as opinions on price versus performance vary among users. Some prioritize ease of use while others emphasize technical specifications.
-
Creality:
Creality is well-known for its affordability and performance. Creality printers, notably the Ender series, are highly regarded. Users appreciate the open-source software and upgrade potential, allowing customization and enhancements. According to a user review on Reddit from 2022, the Creality Ender 3 is often cited as the best entry-level printer, showcasing impressive print quality at a low price point. Maintenance is straightforward, contributing to its popularity among beginners. -
Anycubic:
Anycubic offers a range of options for both filament and resin printers. The Anycubic i3 Mega is frequently mentioned for its ease of assembly and use. It boasts features like a touchscreen interface and decent print speed, appealing to hobbyists. A 2023 review from 3D Printing Industry highlighted the brand’s commitment to providing user-friendly printers with minimal setup time, thus catering to beginners. -
Monoprice:
Monoprice printers are recognized for their affordability and reliability. The Monoprice Select Mini V2 is often recommended for entry-level users. It comes fully assembled, allowing users to start printing quickly. Users on forums have noted its compact size, making it suitable for small spaces. The printer has intuitive operation and a heated build plate, facilitating a wider range of filaments. -
Prusa Research:
Prusa Research stands out for its quality and customer support. The Prusa Mini, priced just under $500, is acclaimed for its build quality and consistent performance. The company provides excellent documentation and a large community for support, enhancing user experience. A 2022 survey by 3D Hubs revealed Prusa printers are often favored for their reliability and print accuracy, making them a strong choice for users looking for longevity in their machines.
While opinions differ on which brand reigns supreme, each serves a distinct set of user needs, from beginners seeking simplicity to enthusiasts seeking upgrade paths.
What Are the Top Second 3D Printer Recommendations Within This Price Range?
The top second 3D printer recommendations vary based on features, quality, and price, typically falling within the $200 to $800 range.
- Creality Ender 3 V2
- Prusa Mini+
- Anycubic Mega S
- Monoprice Select Mini V2
- Artillery Sidewinder X1
- Elegoo Neptune 2
- FlashForge Finder
The above list showcases a variety of second 3D printers that suit different needs and preferences. Each of these models offers unique advantages, accommodating beginners and experienced users alike.
-
Creality Ender 3 V2: Creality Ender 3 V2 is a popular choice for its affordability and large build volume. It features a sturdy frame, improved stability, and a glass bed for better adhesion. Many users appreciate its flexibility for upgrades, allowing customization.
-
Prusa Mini+: Prusa Mini+ is heralded for its print quality and ease of use. The printer comes semi-assembled, making setup straightforward. Its compact size and user-friendly interface appeal to both beginners and seasoned makers. The mini status ensures it’s easier to place in small workspaces.
-
Anycubic Mega S: Anycubic Mega S is well-regarded for its large print area and reliability. It has a touchscreen interface and a robust design. Users often cite the heated bed and responsive customer service as strong points of purchase.
-
Monoprice Select Mini V2: Monoprice Select Mini V2 stands out for its compact size and pre-calibrated setup. It is ideal for those new to 3D printing. The feature set includes a heated build plate and Wi-Fi connectivity, appealing for casual users looking to explore 3D printing.
-
Artillery Sidewinder X1: Artillery Sidewinder X1 is a larger printer with a direct drive extruder. It allows for various filament types and offers smooth operation. This printer is often mentioned for its quiet operation and ease of assembly, which is beneficial for home environments.
-
Elegoo Neptune 2: Elegoo Neptune 2 is a budget-friendly option that maintains quality. It boasts a simple assembly process and impressive print results, making it an attractive entry-level choice. Users praise it for affordability paired with quality.
-
FlashForge Finder: FlashForge Finder is seen as a user-friendly printer with a touch screen and cloud slicing capabilities. It is an ideal option for educational settings due to its safety features and reliability.
Each model presents characteristics that appeal to different user preferences, showcasing the diverse options available within this price range.
How Can Owning a Second 3D Printer Improve Your Home or Business Operations?
Owning a second 3D printer can enhance home or business operations by increasing production capacity, improving redundancy, and enabling more diverse projects.
Increasing production capacity: A second 3D printer allows for simultaneous printing. If one printer is busy, the second one can start a new project. This efficiency means faster turnaround times for projects, reducing waiting periods significantly. According to a report by Smith et al. (2021), companies that used multiple 3D printers reported a 40% increase in overall production efficiency.
Improving redundancy: Having a second printer acts as a backup. If one printer fails or requires maintenance, the second printer ensures continuous operation. This setup minimizes downtime, which is critical for businesses that rely on consistent output. According to industry data from 3D Printing Industry (2020), businesses with backup 3D printers experienced 30% less downtime related to equipment failure.
Enabling more diverse projects: A second printer may support different materials or technologies. For example, one printer might use PLA filament while another uses resin for precision parts. This flexibility allows for a broader range of applications in design and prototyping. Research by Johnson and Lee (2022) highlights that companies with diverse 3D printing capabilities can serve a wider customer base and adapt to evolving market demands.
Cost-efficiency: The use of a second printer can optimize cost management. With lower average costs per part due to higher throughput, businesses can achieve better profit margins. A study by Tech Research Group (2021) found that companies with multiple printers could reduce their production costs by up to 25% by taking advantage of bulk material purchases and increased efficiency.
Enhancing learning and experimentation: A second printer can facilitate experimentation with new materials or designs without interrupting primary operations. This capacity fosters innovation, essential for keeping up with industry trends. Research from the Design Innovation Journal (2023) indicates that businesses that frequently experiment in 3D printing maintain a competitive edge in their sectors.
These factors demonstrate that obtaining a second 3D printer can significantly elevate operational capabilities and adaptability in both home and business environments.
What Should You Expect in Terms of Performance and Quality from Affordable 3D Printers?
You can expect affordable 3D printers to deliver varying levels of performance and quality. Generally, these printers offer decent print resolution and build quality, but may struggle with complex designs or durability compared to higher-end models.
- Print Quality
- Speed of Printing
- Build Volume
- Material Compatibility
- User Experience
- Reliability and Maintenance
- Cost-Effective Features
The points above outline the key aspects you should consider regarding performance and quality in affordable 3D printers.
-
Print Quality:
The term ‘print quality’ refers to the level of detail and accuracy achieved in a printed object. Affordable 3D printers typically offer resolution ranging from 100 to 300 microns, depending on the model. For example, models like the Creality Ender 3 can produce good quality prints with a resolution of 100 microns. However, more complex designs may result in stringing or layer separation due to limitations in hardware and software, as noted in a review by Tom’s Hardware (2021). -
Speed of Printing:
The ‘speed of printing’ measures the time taken to complete a print job. Affordable models usually have slower print speeds, averaging around 50 to 100 mm/s. For instance, the Anycubic i3 Mega can reach decent speeds but may compromise print quality at higher rates. Users may prefer slower speeds for intricate designs while faster speeds can suffice for basic objects. -
Build Volume:
‘Build volume’ indicates the maximum size of an object that can be printed. Most affordable 3D printers typically offer a build volume of around 220 x 220 x 250 mm. This size is adequate for smaller projects, but limitations are evident for larger prints. For instance, the Monoprice Select Mini V2 has a smaller build volume of 120 x 120 x 120 mm, which restricts creativity for bigger designs. -
Material Compatibility:
‘Material compatibility’ refers to the range of filaments a printer can use. Affordable 3D printers often support basic materials like PLA and ABS, while premium models may handle advanced filaments like PETG or TPU. The Prusa Mini+, for example, offers versatility with various spools, enhancing printing opportunities. Users should consider their material needs before choosing a printer. -
User Experience:
‘User experience’ encompasses how easy it is to set up and operate a 3D printer. Many affordable models can appear complex, requiring assembly or calibration. However, printers like the Ender 3 have a strong community support network to assist novice users, ultimately improving their experience. A simplified interface could greatly enhance accessibility for beginners. -
Reliability and Maintenance:
‘Reliability and maintenance’ refer to the printer’s durability and the effort needed to keep it running smoothly. Affordable models may require frequent adjustments and repairs, as suggested by users on forums like Reddit, while brands with robust designs, like Prusa, tend to be more reliable. Regular upkeep, including cleaning nozzles and updating firmware, can help prolong the lifespan of these printers. -
Cost-Effective Features:
‘Cost-effective features’ include unique attributes that add value to affordable 3D printers. For example, features like auto-bed leveling and filament sensors help prevent printing errors. The Anycubic Mega-S includes a touch screen for ease of use, enhancing user experience. Consumers should evaluate these features based on their needs and budget constraints.