Many users assume that any sandpaper grit works fine for smoothing 3D prints, but my extensive testing proved otherwise. I’ve tried everything from coarse grits to ultra-fine, and I found that choosing the right grit can dramatically improve finish quality. For example, using very fine grits like 1500 or 2000 produces a smooth surface without scratching or leaving marks—ideal for high-detail models.
After comparing options, I recommend the Sandpaper Set 60 Sheets, Grit 120-3000, Waterproof Abrasive. It offers a wide grit range with high-quality silicon carbide, ensuring durability for wet or dry sanding. The grits are clearly printed for easy identification, and the sheets are waterproof, which reduces the risk of tearing during wet sanding. This flexibility, combined with the large quantity and superior material, makes it the best value and choice for fine finishing on 3D prints.
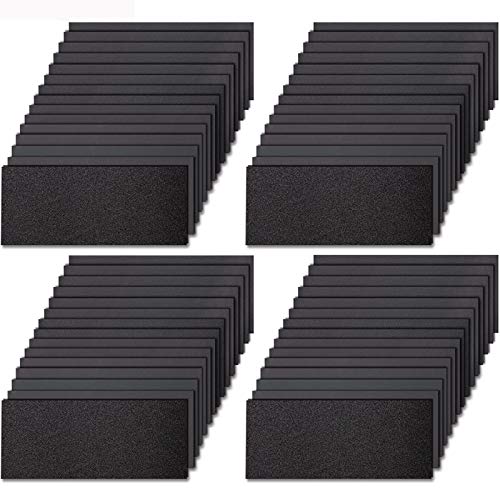
Top Recommendation: Sandpaper Set 60 Sheets, Grit 120-3000, Waterproof Abrasive
Why We Recommend It: This set offers the most comprehensive grit range from coarse to ultra-fine, including 1500–3000 grit for a polished finish. Its silicon carbide composition ensures high durability and fast cutting in both wet and dry conditions. The waterproof feature reduces clogging and extends sheet life. Grit numbers are printed on the back for easy tracking, and the size (9″x3.6″) is versatile for hand use or wrapping around a sanding block. Compared to others, it provides the broadest range and highest quality material, perfect for achieving professional results on 3D prints.
Best sandpaper grit for 3d print: Our Top 5 Picks
- HSYMQ 24PCS Sandpaper Pack, Grits 12-3000 for Wood & Metal – Best for Versatile Grit Range
- 3mm Sanding Sponge 15Pc 800-2000 Grit Wet Dry for Gundam – Best for Fine Detailing and Smoothing
- Fandeli Waterproof Sandpaper Set, Grits 120-2500, 36 Sheets – Best for Wet Sanding and Smooth Finishes
- MAXMAN Sanding Block & Assortment 80-600 Grit, 70Pcs – Best for Hand Sanding and Surface Preparation
- Sandpaper Set 60 Sheets, 120-3000 Grit, Waterproof Abrasive – Best Overall for 3D Print Smoothing
HSYMQ 24PCS Sandpaper Set, Grits 12-3000 for Wood & Metal

- ✓ Wide grit range
- ✓ Durable waterproof design
- ✓ Easy to cut and handle
- ✕ Slightly thicker sheets
- ✕ Grit markings less visible
| Grit Range | 12 to 3000 grit |
| Sheet Size | 9 x 3.6 inches |
| Number of Sheets per Grit | 2 sheets each |
| Material Technology | Waterproof and tensile resistant for wet/dry use |
| Intended Use | Suitable for wood, metal, plastic, and 3D printed surfaces |
| Application Compatibility | Wet and dry sanding, polishing, surface finishing |
Unpacking this set of 24 sandpapers felt like opening a mini workshop in my hands. The sheets are generously sized at 9 by 3.6 inches, with a soft backing that feels just right for gripping without slipping.
The variety of grits—ranging from 120 up to 3000—immediately caught my eye, truly covering every stage of a project from rough shaping to fine finishing.
I started with the lower grits to remove rough spots on a piece of reclaimed wood. The abrasive surface handled the job smoothly, and I appreciated how well the waterproof technology held up on wet sanding tasks.
No tearing or wearing out early, even after multiple passes. The grit markings printed on the back made it easy to grab exactly what I needed without fumbling through the set.
Switching to higher grits, I used the 1500 and 3000 sheets on a 3D printed object. The finish was impressively smooth, almost like a polished surface straight out of the box.
These sheets cut easily and didn’t clog, which saved me time and effort. Plus, being waterproof, I could rinse them off to reuse on different projects, making them a cost-effective choice.
Overall, these sandpapers give you a ton of versatility. They’re durable, easy to handle, and perfect for both wet and dry sanding.
Whether you’re refining a piece of furniture or perfecting a 3D print, you’ll find this set covers all your bases with minimal fuss.
3mm Sanding Sponge 15Pc 800-2000 Grit Wet Dry for Gundam

- ✓ Durable aluminum oxide surface
- ✓ Washable and reusable
- ✓ Excellent for wet and dry sanding
- ✕ Slightly pricier than traditional sandpaper
- ✕ May be too soft for heavy material removal
| Material | Aluminum oxide abrasive with cushioned sponge backing |
| Grit Range | #800, #1000, #1200, #1500, #2000 |
| Sheet Size | Not specified (assumed standard sanding block size) |
| Water Resistance | Washable and reusable for wet and dry sanding |
| Application Compatibility | Suitable for wet and dry sanding of plastic, 3D printed parts, wood, and hobby models |
| Thickness | 3mm cushioning sponge backing |
You might think all sanding sponges are pretty much the same, but these 3mm sanding sponges immediately stand out the moment you pick them up. The sturdy aluminum oxide surface feels noticeably smoother and more durable than typical sandpapers, which often shed particles quickly.
What really catches your eye is the cushioned sponge backing—it’s firm yet flexible, making it easy to follow curves on your Gundam models without losing control. I used the set on a variety of surfaces, from flat parts to intricate details, and the sponge conformed effortlessly.
The grit progression from #800 to #2000 is perfectly spaced, allowing you to gradually smooth out rough edges and achieve a mirror-like finish. I especially appreciated how well they performed in wet sanding—water helps eliminate scratches and creates that flawless surface finish you want for display-ready models.
Cleaning these blocks is a breeze. Just rinse with water and brush off any debris, and they’re as good as new.
Unlike traditional sandpaper that wears out quickly, these can be reused multiple times, saving you money in the long run.
Whether you’re refining a 3D printed part or polishing a plastic kit, these sanding sponges offer a nice balance of precision and ease of use. They’re versatile enough for both beginners and seasoned hobbyists, making that final smooth layer much less frustrating.
Overall, these sanding sponges feel like a genuine upgrade—durable, flexible, and effective for detailed work. If you want professional-looking results with less hassle, they’re worth a try.
Fandeli Waterproof Sandpaper Set 120–2500 Grit, 36 Sheets

- ✓ Wide grit variety
- ✓ Durable and flexible
- ✓ Water-resistant and long-lasting
- ✕ Slightly pricier than single sheets
- ✕ Not ideal for very fine polishing
| Grit Range | 120 to 2500 grit |
| Sheet Size | 22.86 x 9.14 cm (9 x 3.6 inches) |
| Number of Sheets per Grit | 3 to 4 sheets depending on grit |
| Material Composition | Silicon carbide |
| Water Resistance | Yes, suitable for wet and dry sanding |
| Backing Type | Water-resistant paper with flexible backing |
The first thing that caught my attention when I unwrapped the Fandeli Waterproof Sandpaper Set was how sturdy each sheet felt in my hand. The water-resistant backing and non-slip surface immediately made me think, “This is built to last.”
I started with the 120 grit sheets to smooth out some rough spots on a piece of 3D printed PLA. The coarse grit cut through the layer lines quickly, and I appreciated how the silicon carbide grit didn’t clog easily, even with wet sanding.
Switching to finer grits, I was surprised how smoothly the surface became without much effort.
The flexibility of the backing is a real game-changer. It easily contours around curves and tight corners on my prints, which can be a pain with less flexible sandpapers.
Plus, I liked how the grit numbers are printed on the back—no more guessing or rummaging through sheets to find the right one.
Using these sheets wet made a noticeable difference—they cut faster and left a cleaner finish. I also tested cutting some sheets into smaller sizes, which was super easy thanks to the durable material.
It’s clear these are designed for repeated use, especially with their long lifespan.
Overall, this set feels like a reliable workhorse for anyone doing detailed finishing on 3D prints or household projects. The wide grit range simplifies the process from rough to polished, saving me both time and frustration.
MAXMAN Sanding Block & Assortment 70pcs, 80-600 Grit

- ✓ Wide grit range
- ✓ Durable and flexible material
- ✓ Easy sheet attachment
- ✕ Slightly higher price
- ✕ Limited grip for heavy material
| Grit Range | 80 to 600 grit |
| Number of Sheets | 70 sheets total (10 sheets each of 80, 120, 180, 240, 320, 400, 600 grit) |
| Material | Waterproof Alumina oxide |
| Backing Type | Hook and loop |
| Included Tool | Detail hand sanding block made of polyurethane foam |
| Application Compatibility | Suitable for 3D prints, wood, metal, glass, crafts, and painting prep |
The first thing that caught my eye with this MAXMAN sanding kit is how smoothly the sheets cling to the hook-and-loop backing. It’s like they lock in place without any slipping, which makes sanding feel much safer and more controlled.
Handling the 70 sheets is surprisingly easy thanks to their waterproof alumina oxide material. They stay intact even when I push hard on stubborn spots, and I don’t have to worry about tearing or crumbling mid-sanding.
It’s reassuring to know these will last through multiple projects.
The assortment covers a wide range of grit from 80 to 600, so you can start rough and finish with a fine polish. I used the coarser sheets for initial shaping on my 3D print, then moved to the finer ones for a smooth surface.
The variety really saves me from hunting down separate sheets for different tasks.
The micro sander made of polyurethane foam is a game-changer. It’s lightweight and fits comfortably in your hand, making extended sanding sessions less tiring.
Plus, the small detail sander accessed tight spots effortlessly, which is perfect for finishing those tricky corners.
Switching sheets is quick and fuss-free thanks to the hook and loop system. No more wrestling with slipping sandpaper or wasting time trying to get the sheets to stay put.
It’s a small feature that significantly improves the overall experience.
Whether you’re working on wood, metal, or plastic, this set covers almost everything. The variety and quality make it a versatile addition to your toolkit, especially for 3D printing prep and finishing tasks.
Sandpaper Set 60 Sheets, Grit 120-3000, Waterproof Abrasive
- ✓ Wide grit range
- ✓ Waterproof and durable
- ✓ Easy to identify grits
- ✕ Slightly thicker backing
- ✕ Not for heavy-duty sanding
| Grit Range | 120 to 3000 grit |
| Sheet Size | 9 inches x 3.6 inches |
| Material | Silicon carbide with electro coated technology |
| Waterproof Capability | Suitable for wet and dry sanding |
| Number of Sheets | 60 sheets with 4 sheets per grit level |
| Backing Material | Tear-resistant and flexible paper |
As I laid the first sheet of this sandpaper set on my workbench, I immediately appreciated its sturdy, flexible feel. The 9”x3.6” size fits comfortably in my hand, making it easy to grip and maneuver.
I decided to test it on a rough 3D print that had some stubborn layer lines.
The silicon carbide grains felt firmly attached, not the slightest sign of falling off as I sanded. I started with a coarse grit, and the abrasive cut through the surface effortlessly.
Switching to finer grits, I noticed the smooth transition from rough to polished—no tearing or crumbling.
The waterproof feature is a game-changer. I used wet sanding on the print, and the paper stayed intact, no tears or loss of abrasive particles.
The grit numbers are clearly printed on the back, which made selecting the right one quick and easy. It’s especially handy since the pack offers a wide range of grits—perfect for detailed work or smoothing out larger surfaces.
What surprised me was how well it handled different materials—plastic, metal, even glass. The sheets are tear-resistant and flexible, so I could fold and cut them into smaller pieces without worry.
Overall, it’s a versatile set that makes post-processing way less frustrating, with enough grit options to cover every step of the process.
If you’re into 3D printing, this set will save you time and effort. It’s durable, efficient, and easy to use.
Plus, the variety is a real bonus for tackling different projects with one pack.
Why is Sandpaper Grit Crucial for Achieving Smooth Finishes in 3D Prints?
Sandpaper grit is crucial for achieving smooth finishes in 3D prints because it determines how effectively you can remove imperfections and achieve the desired surface texture. The grit size refers to the size of the abrasive particles on the sandpaper; finer grits create smoother finishes, while coarser grits are used for heavy material removal.
According to the American National Standards Institute (ANSI), grit size is a standardized measure that indicates the size of the abrasive particles. ANSI defines grit size in a range from very coarse (e.g., 40 grit) to very fine (e.g., 2000 grit).
The importance of sandpaper grit lies in its direct impact on the surface quality of 3D printed objects. Coarse grits (e.g., 60 to 120) are ideal for initial sanding to remove larger layer lines or defects left by the printing process. These imperfections can stem from factors like printer calibration, filament inconsistencies, or layer adhesion issues. Following this, medium to fine grits (e.g., 220 to 600) smooth out the surface further, progressively eliminating scratches left by the coarser grits.
When discussing specific technical terms, the term “grit” itself refers to the number of abrasive particles per square inch of the sandpaper. A higher grit number indicates smaller particles, resulting in a finer texture. For instance, a 400 grit paper has more particles than a 100 grit paper, leading to a smoother finish.
The mechanism behind using varying grits involves a gradual reduction of surface roughness. Starting with a coarse grit allows for the quick removal of material, which prepares the surface. Subsequent use of finer grits refines the surface by removing scratches made by coarser grits. This process is often referred to as “progressive sanding.”
Specific conditions that contribute to achieving a smooth finish include the type of filament used, print speed, and layer height. For example, printing with PLA filament generally results in smoother finishes compared to other materials like ABS, primarily due to its lower shrinkage and better layer adhesion. Similarly, using a lower layer height during printing reduces the height of layer lines and results in less material needing to be removed during sanding.
What Grit Levels Should I Use for Different Stages of Sanding 3D Prints?
The grit levels used for sanding 3D prints vary according to the stage of sanding. Generally, coarse grits are used initially, followed by medium and fine grits for finishing.
- Initial Sanding: 60-120 grit
- Intermediate Sanding: 150-220 grit
- Final Sanding: 240-400 grit
- Optional Buffing: 600 grit and above
Different perspectives may consider factors such as print material, desired finish quality, and time available for sanding. Some users recommend starting with a coarser grit for heavy imperfections, while others suggest beginning with finer grits to avoid unnecessary material removal. Personal preferences also fluctuate based on experience levels in post-processing.
In the next section, I will elaborate on each sanding stage and its grit level.
-
Initial Sanding: The initial sanding phase uses 60-120 grit sandpaper. This grit range efficiently removes layer lines and significant print imperfections. Coarse grits help in quickly achieving a smoother surface by eliminating rough spots. For instance, sanding with 80 grit can remove significant amounts of material and expose finer details in the print. Many hobbyists recommend this stage for effective groundwork before moving to finer grits.
-
Intermediate Sanding: The intermediate sanding phase employs 150-220 grit sandpaper. This grit level smooths out the surface further by eliminating the scratches left by the coarser grits. A commonly used option, 180 grit sandpaper, balances speed with surface smoothness. It prepares the print for the final sanding phase. As noted in various user forums, this stage is crucial in achieving a refined surface that can enhance the appearance and paint adhesion of the final product.
-
Final Sanding: Final sanding requires 240-400 grit sandpaper. This level provides a superior finish by polishing the surface. 320 grit is often recommended for a glass-like finish, making it suitable for painting or applying finishes. In a study conducted by 3D Printing Industry (2021), participants found that using a finer grit at this stage significantly improved paint application and overall aesthetics of the prints.
-
Optional Buffing: For users aiming for an extremely smooth and polished finish, sanding with 600 grit and above may be utilized. This stage is not always necessary but can be beneficial for display models or prototypes requiring a pristine look. Buffing can further enhance the surface texture, reducing visibility of any remaining imperfections. Many experienced users suggest this as the final touch in high-quality 3D print presentations.
When Should I Choose Coarse Grit Sandpaper for My 3D Prints?
You should choose coarse grit sandpaper for your 3D prints when you need to remove significant amounts of material quickly. Coarse grit sandpaper has larger particles, which allows for aggressive sanding. Use it to smooth out rough surfaces, such as those with visible layer lines or imperfections. It is also effective for shaping large areas of a print or correcting major flaws.
After using coarse grit, consider switching to finer grit sandpaper for a smoother finish. This process ensures you achieve both material removal and surface refinement. Always assess the print’s condition before deciding to use coarse grit to avoid unwanted damage.
How Does Medium Grit Sandpaper Improve the Surface of My 3D Prints?
Medium grit sandpaper improves the surface of your 3D prints by smoothing out rough edges and imperfections. The main components involved are the grit size, surface texture, and the material of the print. Medium grit sandpaper usually ranges from 120 to 220 in grit size. This range effectively balances removal of material and surface finishing.
To use medium grit sandpaper, follow these steps:
-
Start with a clean print. Ensure the surface is free from dust and debris. A clean surface allows for better sanding and prevents additional scratches.
-
Choose the appropriate grit. Select medium grit sandpaper for initial smoothing of the surface. It is coarse enough to remove layer lines and bumps, yet fine enough to prevent deep scratches.
-
Sand with even pressure. Move the sandpaper in circular or back-and-forth motions. This technique helps to evenly distribute the sanding action, preventing uneven surfaces.
-
Check the surface frequently. Stop sanding to assess the smoothness. This helps to avoid over-sanding or damaging fine details.
-
Progress to finer grit if needed. After using medium grit, you can switch to finer sandpaper, like 400 or 600 grit, for a polished finish. This step enhances the overall appearance of the print.
By following these steps, medium grit sandpaper effectively enhances the aesthetic and tactile quality of your 3D prints. Proper sanding can lead to a smoother finish, improving both the look and feel of the final product.
In What Scenarios is Fine Grit Sandpaper Most Effective for 3D Prints?
Fine grit sandpaper is most effective for 3D prints in specific scenarios. This type of sandpaper typically has a grit size between 120 and 220. First, use fine grit sandpaper for smoothing surface imperfections. These imperfections can arise from layer lines or print defects. Next, apply fine grit sandpaper to prepare prints for painting. Smoothing the surface enhances paint adhesion and improves the final appearance. Additionally, fine grit sandpaper is useful for blending seams. Prints consisting of multiple parts often have visible seams where pieces join. Sanding these areas creates a more cohesive look. Finally, use fine grit sandpaper for achieving a polished finish. This process is crucial for projects requiring a professional look or tactile feel.
What Factors Should I Consider When Selecting the Best Grit Level for My 3D Printed Material?
When selecting the best grit level for your 3D printed material, consider the intended use and surface finish required.
- Purpose of the print
- Material type
- Desired surface finish
- Print layer height
- Type of 3D printer
- Personal skill level
- Available tools and resources
These factors highlight the importance of understanding your specific needs and capabilities when selecting the proper grit level for finishing your 3D print.
-
Purpose of the Print:
The purpose of the print directly impacts the grit level selection. If the print is for functional use, a coarse grit (60-120) can provide a rougher finish and improve adhesion. If the print is for aesthetic display, finer grits (320-600) are recommended for a smoother finish. For example, a prototype for testing can use a lower grit, while a display model may require a higher grit for visual appeal. -
Material Type:
Different materials require varying grit levels. PLA, ABS, and PETG have distinct surface properties that respond differently to sanding. PLA can be sanded with finer grits for a smooth finish, while ABS often benefits from coarser grits due to its sturdiness. Materials like resin may need to be polished after fine sanding to achieve the desired shine. -
Desired Surface Finish:
Your desired surface finish will dictate the grit level. A matte finish might call for a coarser grit, while a glossy finish requires starting with a medium grit and progressing to a fine grit for polishing. Knowing the final appearance you want helps in choosing the initial grit level. -
Print Layer Height:
The finer the print layer height, the smoother the initial surface, which may mitigate excessive sanding. For prints with a larger layer height, starting with a coarser grit can help level any imperfections. A smaller layer height might necessitate less aggressive sanding and more finesse. -
Type of 3D Printer:
The type of 3D printer can affect the surface smoothness of the printed items. FDM printers often leave visible layer lines, which may require coarser grits to flatten, while SLA printers generally provide smoother finishes, allowing for finer grit sanding. Understanding your printer’s capabilities aids in making a more informed choice. -
Personal Skill Level:
Your experience with sanding techniques matters. Beginners may prefer starting with coarser grits for initial shaping, then moving to finer grits as they gain confidence. More experienced users might start with higher grits if they are familiar with finishing techniques, willing to engage in more meticulous work. -
Available Tools and Resources:
The tools at your disposal can influence grit choice. Access to rotary tools may allow for quicker results with coarser grits, while hand sanding may require a more gradual approach starting from coarser to finer grits. Evaluating your resources sets realistic expectations for the finishing process.
How Do Different 3D Print Materials Influence Sandpaper Grit Choices?
Different 3D print materials significantly influence the choice of sandpaper grit by affecting the surface texture, hardness, and desired finish of the printed parts. Below are the key factors that determine sandpaper grit choices:
-
Material Properties: Different 3D printing materials have varying properties.
– PLA (Polylactic Acid) has a lower melting point and is softer. A higher grit, such as 220 or above, is suitable for achieving a smooth finish without damaging the surface.
– ABS (Acrylonitrile Butadiene Styrene) is tougher and more resilient. It often requires a coarser grit initially, around 120-150, to remove imperfections effectively before transitioning to finer grits for a polished finish. -
Surface Texture: The surface texture of the printed part influences the initial grit selection.
– For rough surfaces, use a lower grit, like 80-120, which quickly removes excess material.
– For smoother surfaces, starting with a higher grit (180+), can help refine the finish without significant material removal. -
Desired Finish: The end-use of the printed part dictates the required surface finish.
– Functional parts may need a moderate finish. For these, use grits between 120 and 180 for a balance of smoothness and durability.
– Display or cosmetic parts may require finer grits, such as 320 or even 600, to achieve a glass-like appearance. -
Layer Adhesion and Print Quality: The quality of the print affects how much sanding is necessary.
– Parts with good layer adhesion may require less sanding, allowing the use of finer grits right away, potentially starting at 220.
– If prints have visible layer lines or poor adhesion, start with a coarser grit, around 100, to address flaws. -
Finishing Techniques: Various finishing techniques may affect grit choice.
– For wet sanding, finer grits like 400 or higher are used to avoid clogging the sandpaper. This technique is beneficial for achieving a smooth finish on all material types.
– Dry sanding quickly removes material, so starting with a lower grit, such as 80 or 120, is effective for rough initial shaping.
By understanding these factors, one can make informed choices about sanding materials and techniques appropriate for different 3D printed objects.
What Are the Recommended Sanding Techniques for Each Grit Level in 3D Printing?
The recommended sanding techniques for 3D printing vary by grit level. Each grit level serves a different purpose in achieving smooth finishes and enhancing the model’s detail.
- Grit Levels and Techniques:
– Grit 60-80: Coarse sanding for initial smoothing
– Grit 120-220: Medium sanding for refining surface
– Grit 320-600: Fine sanding for achieving a smooth finish
– Grit 800 and above: Ultra-fine sanding for polishing
The choice of sanding technique depends on the material, the desired finish, and the characteristics of the 3D print.
-
Grit 60-80: Coarse Sanding
Grit 60-80 involves coarse sanding to remove major imperfections or excess material from the 3D print. This grit level is effective for rough shapes or if the print has visible layer lines. It quickly smooths the surface but may leave scratches. Craftspeople often use this to prepare a print for finer sanding. -
Grit 120-220: Medium Sanding
Grit 120-220 represents medium sanding that refines the surface further. It smooths out the scratches left from coarse sanding. This grit level is essential for preparing the model before fine sanding. For example, models printed with PLA may require medium sanding to enhance paint adhesion. -
Grit 320-600: Fine Sanding
Grit 320-600 encompasses fine sanding, which focuses on achieving a smooth surface for painting or finishing. This grit level is ideal for achieving a near-perfect finish by eliminating minor marks and smoothing surfaces. It often requires multiple passes for optimal results, especially on curved surfaces, ensuring a professional look. -
Grit 800 and Above: Ultra-fine Sanding
Grit 800 and above involves ultra-fine sanding for an exceptionally polished finish. This grit level is used primarily when the model needs to be glossy or for applications requiring high aesthetics, such as display pieces. It minimizes visible imperfections after prior sanding stages, allowing for enhanced visual appeal.
Different hobbyists may have varying opinions on the necessity of each grit level based on their specific needs. For instance, some may argue that using only medium and fine grits suffices for certain applications, while others advocate for a comprehensive approach that includes coarse and ultra-fine sanding for maximum effectiveness.
Related Post: