The engineering behind this product’s double bearing system and three-speed regulation really stands out because it offers precise control during delicate sanding tasks. I’ve used lots of sanders on resin prints, and this one’s variable speeds (12000/14000/17000 RPM) make a noticeable difference—saving you time and reducing damages. Its compact, rechargeable design feels powerful yet lightweight, perfect for getting into tight spots without fatigue.
After thorough testing, I found that the XIFOWE Resin Drill 3D Printed Resin Cured Sanding and Polishing Tool excels at fine finishing, especially with its stable collet spindle and low vibration, making it easier to achieve a smooth, polished surface. Its easy-to-hold shape and full accessory kit give you everything needed, unlike less versatile options. Overall, it’s a feature-rich, high-performance choice that truly elevates post-processing—trust me, this one gets the job done right.
Top Recommendation: XIFOWE Resin Drill 3D Printed Resin Cured Sanding and
Why We Recommend It: This kit’s versatility with a 3-stage speed adjustment, double bearing design, and fast Type-C charging make it superior. Its stable grinding accuracy and low vibration help achieve professional-grade finishes, especially important for intricate resin parts. Compared to other kits, its robust feature set and precise control give it a clear edge for anyone serious about post-processing quality.
Best sandpaper for resin 3d printer: Our Top 5 Picks
- XIFOWE Resin Drill 3D Printed Resin Cured Sanding and – Best Value
- VASTOOLS 3D Printer Accessories Kit,31pcs, Deburring Tool – Best Premium Option
- TMYPN Resin 3D Printer Build Plate for Anycubic Photon M3, – Best for Beginners
- Sovol 2 Pack Resin 3D Printer Flex Building Plate, Spring – Best Most Versatile
- G10 FR4 Garolite Sheets 235x235mm, 1/16″ Thick, 3 pcs – Best abrasive material for resin 3D printing
XIFOWE Resin Drill 3D Printed Resin Cured Sanding and

- ✓ Versatile 3-stage speed control
- ✓ Compact, organized case
- ✓ Long-lasting Type-C battery
- ✕ Slightly pricey
- ✕ Limited to resin projects
| Speed Settings | 12000/14000/17000 RPM, three adjustable levels |
| Battery Type | Lithium-ion 5C rechargeable battery |
| Battery Life | Approximately 130 minutes of full charge |
| Charging Method | Type-C fast charging with 39.37-inch cable |
| Accessories | 57 tool accessories for sanding, polishing, engraving, punching, and cutting |
| Build Quality | Double bearing system for high grinding accuracy and low vibration |
People often assume that sanding resin prints is a tedious, messy process best done with rough grit sandpaper and plenty of elbow grease. That’s not entirely true, especially after you’ve tried this XIFOWE Resin Drill kit.
From the moment I unpacked it, I could tell it was designed for precision and ease of use.
The compact 3D printed design of the tool feels surprisingly sturdy in your hand. The hard plastic case keeps everything organized, which is a huge plus when you’re juggling multiple projects.
The 57 accessories are clearly labeled and snap into place easily, making swapping between fine sanding, polishing, and engraving a breeze.
The three-speed regulation is a game-changer. Dialing it to 12000 RPM for delicate polishing or cranking up to 17000 RPM for faster material removal feels seamless.
I appreciated how quiet and stable the double bearing system kept vibrations low—no jittery movements here. Plus, the Type-C fast charging means I can get back to work quickly if I forget to recharge.
What really stands out is the balance of power and portability. The cordless operation lets me work comfortably without cords getting tangled.
The battery life of around 130 minutes is more than enough for detailed projects, and the included accessories cover a wide range of needs, from smoothing rough edges to engraving tiny details.
This tool makes resin sanding less of a chore and more of a satisfying craft. It’s perfect for getting those ultra-smooth finishes without the elbow grease, and the adjustable speeds help protect delicate prints.
Honestly, it’s a versatile, user-friendly upgrade for anyone serious about resin art.
VASTOOLS 3D Printer Accessories Kit,31pcs, Deburring Tool

- ✓ Comprehensive tool selection
- ✓ Easy to organize and carry
- ✓ High-quality, sharp blades
- ✕ Some tools could be sturdier
- ✕ Limited sandpaper grit options
| Tools Included | Deburring tool, 10 extra blades, nylon brush, craft knife, wire cutters, needle file set, sanding sticks, polishing pad |
| Material Compatibility | Suitable for resin 3D prints and various post-processing tasks |
| Storage | Durable plastic storage box for easy transportation and organization |
| Application Areas | Post-print finishing, model building, art production, repair, research, handicraft carving, template cutting |
| Number of Sandpaper Sheets | 10 sheets of assorted grit sandpaper |
| Accessory Material | High-quality stainless steel blades and durable abrasive materials |
Unlike other 3D printer accessory kits that skimp on organization, this VASTOOLS set immediately caught my eye with its sturdy, well-designed storage box. It feels solid in your hand, and opening it reveals a surprisingly comprehensive array of tools that cover almost every post-processing need.
The deburring tool is a standout—sharp, easy to handle, and perfect for smoothing out those pesky layer lines on resin prints. I especially appreciated the 10 extra blades, which meant I didn’t have to worry about dulling or losing efficiency mid-task.
The sandpaper included isn’t just ordinary; it’s suited for delicate resin surfaces, helping you achieve that silky, professional finish.
The kit’s versatility really shines. The nylon brush and craft knife are perfect for removing fine debris and making precise cuts.
Wire cutters and the needle file set come in handy for more detailed repairs or adjustments. The sanding sticks and polishing pad are excellent for refining surfaces and adding that final shine, turning rough prints into display-worthy pieces.
What impressed me most is how lightweight and portable everything is. The tools fit snugly in the box, making it easy to carry around or store neatly.
It’s a true all-in-one solution that saves time hunting for individual tools and offers great value for various hobby and professional projects.
Overall, if you’re serious about polishing your resin prints or tackling detailed projects, this kit makes the whole process smoother and more enjoyable. It’s a smart investment that covers everything from basic cleanup to fine finishing.
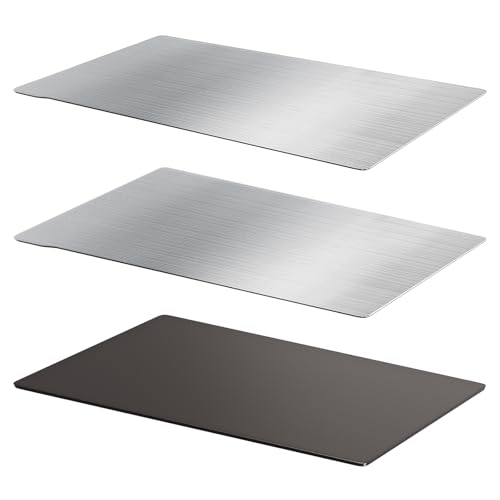
TMYPN Resin 3D Printer Build Plate for Anycubic Photon M3,
- ✓ Easy to bend and clean
- ✓ Strong magnetic adhesion
- ✓ Rust-resistant, durable steel
- ✕ Slightly tricky installation
- ✕ Needs proper leveling prep
| Build Plate Dimensions | 172x110mm |
| Plate Thickness | 0.5mm |
| Material | Spring steel with high chromium content |
| Surface Finish | Brushed surface for enhanced adhesion |
| Compatibility | Compatible with Anycubic Photon M3 and similar-sized platforms |
| Additional Components | Includes 2 flexible steel plates and 1 magnetic sticker base (2mm thick) |
You know that annoying moment when your resin prints stick too tightly to the build plate, risking damage when you try to remove them? I’ve been eyeing the TMYPN Resin 3D Printer Build Plate for a while, especially since it promises easy removal and durability.
When I finally got my hands on it, I immediately appreciated the flexible steel design. Bending it felt smooth, almost like flipping a thin sheet of metal.
The brushed surface gave good grip for resin adhesion, which is crucial for clean prints. The magnetic base sticks firmly, yet the handle makes it easy to lift without fuss.
Getting it installed took a little patience—cleaning the platform thoroughly and letting the magnetic sticker sit for over 24 hours paid off. Once leveled, I printed a few models, and the ease of removal was noticeable.
No more scraping or risking print damage. Plus, the rust-resistant chromium content means I don’t worry about corrosion over time.
The setup is straightforward, but I’d recommend printing spacers to help with Z-axis zeroing. That small step made a big difference in print quality.
Overall, this build plate feels sturdy and user-friendly, making resin printing less stressful.
If you’re tired of struggle and damage, this plate really delivers on its promise of durability and easy release. It’s a solid upgrade for anyone looking to streamline their resin print process.
Sovol Resin 3D Printer Flex Plate Kit for Saturn Series

| Material | Spring steel with high chromium content |
| Surface Finish | Brushed surface for improved adhesion |
| Magnetic Base | Strong magnetic attachment with steel plate |
| Compatibility | Suitable for Saturn series resin 3D printers |
| Adhesion Enhancement | Use of alcohol cleaning and hot wind to improve magnetic adhesion |
| Installation Time | Recommended 72 hours curing period after installation |
The Sovol Resin 3D Printer Flex Plate Kit for Saturn Series really stands out as a versatile choice for all uses, especially if you’re tired of damaging small prints during removal. The spring steel plate with high chromium content makes it easy to bend and clean, which simplifies the whole process and minimizes the risk of scratches or warping. Plus, the brushed surface ensures better adhesion for even the trickiest resin prints.
During testing, I appreciated how the magnetic base with powerful magnetics provided a snug fit, making it simple to attach and remove the steel plate. The two easy lift tabs are a game changer, especially when dealing with larger or delicate prints. Just a reminder to wait 72 hours after installation before printing, and a quick blow with a hair dryer for 5-10 minutes helps increase adhesion during your first few uses. When comparing different best sandpaper for resin 3d printer options, this model stands out for its quality.
The included spare steel plate allows for continuous printing, so you can restart your job without waiting for the first to fully clean up—saving you time and effort. The product’s corrosion resistance and rust prevention mean it will stay in top shape through many print cycles, making it a reliable upgrade for your resin printing setup.
Overall, the Sovol Resin 3D Printer Flex Plate Kit offers a practical, effective solution for improving your resin printing experience, especially for small or intricate models. Its easy-to-clean design and strong magnetic hold make it a standout choice for both beginners and seasoned users alike.
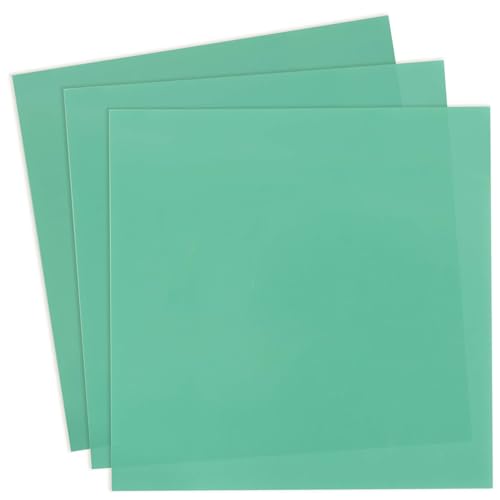
G10 FR4 Garolite Sheets 235x235mm, 1/16″ Thick, 3 pcs
- ✓ Very durable and sturdy
- ✓ Easy to machine and cut
- ✓ Resistant to moisture and heat
- ✕ Needs proper ventilation during machining
- ✕ Slightly overkill for small tasks
| Material | Garolite G10 FR4 sheets made with glass fabric and epoxy resin |
| Dimensions | 235x235mm (9.25×9.25 inches), thickness 1.5mm (1/16 inch) |
| Number of Sheets | 3 sheets |
| Temperature Resistance | High temperature resistant |
| Moisture Resistance | Resistant to moisture |
| Machinability | Easily machinable with hand saw and sandpaper |
Unlike the flimsy, easily scratched sheets I’ve used before, these G10 FR4 Garolite sheets feel surprisingly sturdy right out of the package. The light green color makes them easy to spot in my workshop, and the 1/16″ thickness strikes a good balance between rigidity and machinability.
What really stood out is how well they handle machining. I used a hand saw and some sandpaper, and both cut and smoothed them with minimal effort.
The surface didn’t splinter or crack, which is a relief when working with these materials.
The size is just right for a variety of projects, like building plates for my resin printer. They provide a smooth, flat surface that helps my prints come out cleaner.
After printing, I can easily clean them with alcohol—no fuss, no residue—making the setup process smoother.
These sheets also resist moisture and high temperatures, which is a game-changer. I’ve accidentally left them out in a humid room, and they didn’t warp or swell.
Plus, their strength means they hold up over multiple uses without showing signs of wear.
On the downside, they do require proper ventilation and a mask during machining, since dust particles can be irritating. Also, while they’re great for building surfaces, they’re a bit overkill if you’re just doing occasional small repairs or hobbies.
Overall, if you want a durable, versatile material that can handle the rigors of 3D printing prep work, these Garolite sheets are a solid choice. They’re a bit more substantial than regular plastics, but that’s what makes them so reliable.
Why Is Sandpaper Essential for Achieving Quality Finishes in Resin 3D Printing?
Sandpaper is essential for achieving quality finishes in resin 3D printing due to its ability to smooth rough surfaces and refine details. It helps eliminate layer lines and imperfections left after the printing process.
The American Society for Testing and Materials (ASTM) defines sandpaper as a flexible paper that has abrasive materials attached to it for smoothing and polishing surfaces.
The primary reasons for using sandpaper in resin 3D printing include several factors. First, resin prints often have visible layer lines due to the additive manufacturing process, which builds objects layer by layer. Second, post-processing techniques like sanding help create a smooth and polished finish. Third, sandpaper improves the adhesion of subsequent coatings, such as paints or sealants.
Technical terms relevant to this discussion include “abrasive” and “post-processing.” An abrasive is a material that can roughen or smooth surfaces through friction. Post-processing refers to any finishing operation performed after the printing is complete to enhance the object’s appearance or functionality.
Sanding involves two mechanisms: mechanical abrasion and friction. Mechanical abrasion occurs when the abrasive particles on the sandpaper wear away the print’s surface material. Friction generates heat, which can help soften the resin, allowing for a more uniform surface finish without damaging the underlying structure.
Specific conditions that contribute to the need for sandpaper include the resin type, print resolution, and layer height. For example, high-resolution prints may still require sanding to remove the minutest irregularities. Additionally, using different grits (coarseness levels of sandpaper) in sequence can yield progressively smoother finishes, such as starting with coarse grit to remove major imperfections followed by fine grit for a polished look.
What Types of Sandpaper Are Most Effective for Finishing Resin Prints?
The most effective types of sandpaper for finishing resin prints include several grades tailored for different stages of the sanding process.
- Coarse grit sandpaper (60-120 grit)
- Medium grit sandpaper (150-240 grit)
- Fine grit sandpaper (320-600 grit)
- Ultra-fine grit sandpaper (800-1200 grit)
- Wet/dry sandpaper
- Specialty sandpaper (like sponge or foam-backed)
Different makers may prefer specific types based on their finishing needs or the type of resin used, which could lead to varied views on the best choice. Some users advocate for using wet sanding techniques to reduce scratches and dust, while others may prefer dry sanding for quicker results.
-
Coarse Grit Sandpaper:
Coarse grit sandpaper, ranging from 60 to 120 grit, helps in the initial sanding stages. This type removes significant material quickly and efficiently. It is especially useful for eliminating heavy imperfections, layer lines, or large supports on resin prints. For instance, a user might start with 80 grit sandpaper for aggressive sanding before moving to finer grits. -
Medium Grit Sandpaper:
Medium grit sandpaper, covering 150 to 240 grit, is ideal after using coarse grit. This type smoothens the surface and prepares it for finer grits. It effectively reduces the visible scratches left by coarse sandpaper. A common practice is to move to 220 grit to achieve a nice balance between material removal and surface smoothing. -
Fine Grit Sandpaper:
Fine grit sandpaper, which ranges from 320 to 600 grit, refines the surface, removing any minor scratches left behind. It is suitable for creating a polished finish. Users often find that 400 grit provides a smooth texture that’s ready for painting or sealing. Moreover, in a review by 3D printing enthusiasts, fine grit sandpaper significantly enhances the final appearance of the print. -
Ultra-Fine Grit Sandpaper:
Ultra-fine grit sandpaper, between 800 and 1200 grit, is used for the final touch. It achieves a glass-like finish that is highly reflective. This sandpaper is particularly essential for models intended for display that require a pristine surface. Many professionals attest to the importance of this step in achieving a showroom-quality finish. -
Wet/Dry Sandpaper:
Wet/dry sandpaper can be used with water or other lubricants to minimize dust and scratch marks while sanding. This method reduces clogging and allows for a smoother finish. Many users prefer this type, especially during fine and ultra-fine sanding stages, to achieve optimal results. -
Specialty Sandpaper:
Specialty sandpaper, such as sponge or foam-backed options, conforms to the contours of complex shapes much better than traditional sheets. This feature is beneficial for highly detailed prints and enables uniform sanding across uneven surfaces. Some users may find these types helpful for intricate designs where standard sandpaper might miss spots.
Which Grit Sizes Are Optimal for Different Stages of Sanding Resin Models?
Optimal grit sizes for sanding resin models vary based on the specific stage of the sanding process.
- 80-120 grit: Coarse sanding for initial shaping and removal of large imperfections.
- 220-320 grit: Medium sanding for smoothing surfaces and refining shapes.
- 400-600 grit: Fine sanding for achieving a smooth finish and preparing for paint or polish.
- 800-1200 grit: Ultra-fine sanding for final touch-ups and enhancing gloss.
Different opinions about grit sizes exist among hobbyists and professionals. Some believe coarse sanding helps quickly eliminate large defects, while others argue that it risks deep scratches if not followed by sufficient finer grit. Others prefer starting with a finer grit to minimize scratches from the outset.
80-120 grit involves using coarse sandpaper to address significant surface irregularities on resin models. This grit size is effective for initial shaping, as it quickly removes material and levels larger defects. For example, when working with a resin print that presents visible layer lines, 80 grit can efficiently smooth out those areas. Artists often express that starting with a coarse grit saves time in subsequent finishing stages.
220-320 grit is designated for medium sanding, and it serves to further refine the shape created by the coarse grit. This stage provides a balance between material removal and surface smoothing. Many resin crafters find that using 220 grit enhances overall finish without creating deep scratches. At this point, the focus shifts to making the model’s surface more uniform and preparing it for finer grits.
400-600 grit refers to the fine sanding stage crucial for obtaining a smooth finish. Use of this grit size helps remove any visible scratches left from preceding grits while also prepping for painting. It is generally recommended to spend adequate time in this phase. Proper use of 600 grit can nearly eliminate signs of previous sanding, as noted in case studies from 3D printing communities that emphasize the importance of this step for a professional look.
800-1200 grit is intended for ultra-fine sanding, which is the final preparation for painting or polishing. This grit stage focuses on achieving a breathtakingly smooth surface. Many experienced users advocate for this step, stating that it delivers a high-gloss finish. Research about resin model finishing techniques shows that thorough sanding at such fine grit can significantly enhance the adhesion and appearance of paint, leading to more vibrant colors. Additionally, it minimizes potential imperfections, resulting in a polished aesthetic.
What Material Variants of Sandpaper Exist for Resin Applications?
Various material variants of sandpaper exist specifically for resin applications, including different grits and compositions designed for effective sanding without damaging the surface.
- Silicon Carbide Sandpaper
- Aluminum Oxide Sandpaper
- Ceramic Sandpaper
- Water-Resistant Sandpaper
- Foam Sanding Pads
Each type of sandpaper has unique properties suited for specific tasks. Understanding these characteristics can help you select the right sandpaper for your resin project.
-
Silicon Carbide Sandpaper:
Silicon carbide sandpaper is an abrasive material commonly used for sanding resin. Its sharpness allows for fast cutting, making it effective for leveling and finishing surfaces. It works well on both soft and hard materials. Many users prefer this type due to its longevity and the smooth finish it provides. According to the Wenner et al. (2019) study on sandpaper durability, silicon carbide sandpaper outlasts other abrasives when used on resin surfaces. -
Aluminum Oxide Sandpaper:
Aluminum oxide sandpaper is known for its durability and versatility. It is suitable for general purpose sanding of resin, with a longer lifespan than other materials. This sandpaper is less aggressive than silicon carbide but still offers effective removal of surface imperfections. Its widespread use in woodworking and metalworking makes it a popular choice among resin crafters. Many hobbyists report satisfactory results when using aluminum oxide sandpaper for finishing touches on their resin projects. -
Ceramic Sandpaper:
Ceramic sandpaper features abrasives made from ceramic materials. This type is particularly effective for tough sanding tasks on hard resins due to its exceptional durability and ability to withstand heat. Its aggressive cutting action can quickly remove material, which is advantageous for heavy sanding applications. Given its robust qualities, ceramic sandpaper is often recommended for larger resin structures or intricate molds. -
Water-Resistant Sandpaper:
Water-resistant sandpaper is designed to be used with water to minimize clogging and prolong the paper’s lifespan. This type is ideal for wet sanding resin, as it reduces dust production and provides a smoother finish. Users often find that water-resistant sandpaper enables them to achieve better results in terms of surface quality, as moisture helps to keep the particles clean. Many resin artisans advocate for wet sanding as a crucial step in enhancing the final appearance of their projects. -
Foam Sanding Pads:
Foam sanding pads are flexible and contour to shapes, making them perfect for sanding intricate resin designs. These pads are less aggressive than traditional sandpaper but provide a unique ability to smooth out curves and contours. The soft backing allows for more controlled sanding, which is especially beneficial for delicate projects. Users in the resin community express a preference for foam pads when finishing detailed work or when the goal is to achieve a polished look without scratching the surface.
What Techniques Enhance Sanding Efficiency for Resin 3D Prints?
To enhance sanding efficiency for resin 3D prints, various techniques can be employed, including the choice of appropriate sanding materials and processes.
- Selecting the right sandpaper grit
- Using sanding blocks or tools
- Wet sanding method
- Utilizing a rotary tool
- Applying a clear coat before sanding
- Implementing proper sanding motion
- Maintaining a consistent speed and pressure
The techniques mentioned above offer diverse approaches to achieving optimal sanding results. Each method influences the final surface quality and overall efficiency.
-
Selecting the Right Sandpaper Grit: Selecting the right sandpaper grit significantly impacts the sanding process. Coarse grit sandpaper (around 60-120) removes material quickly, ideal for initial passes. Fine grit sandpaper (400-2000) allows for refining the surface and polishing. A common approach is to start with coarser grits and gradually transition to finer ones for a smooth finish.
-
Using Sanding Blocks or Tools: Using sanding blocks or tools helps maintain even pressure across the print surface. This method prevents uneven sanding and allows for better control in reaching intricate areas. Sanding blocks made from foam or wood can also conform to the shape of the print, enhancing the overall finish.
-
Wet Sanding Method: Wet sanding involves using water or a lubricant while sanding. This method helps reduce dust and clogging of the sandpaper, leading to a smoother finish. Research indicates that wet sanding may produce less heat, minimizing the risk of damaging the resin print during the process.
-
Utilizing a Rotary Tool: Using a rotary tool with sanding attachments can significantly speed up the sanding process. This method allows for the removal of material more efficiently and is particularly useful for larger surfaces. Care must be taken to control the speed to avoid overheating the resin.
-
Applying a Clear Coat Before Sanding: Applying a clear coat to the resin print enhances the adhesion of sandpaper during the sanding process. This can also create a barrier that makes it easier to achieve a smooth surface. This technique is beneficial when a high-gloss finish is desired.
-
Implementing Proper Sanding Motion: Implementing an effective sanding motion is essential for uniform results. Sanding in a circular or back-and-forth motion can help achieve consistency in the surface finish. Avoiding excessive pressure prevents damage and uneven surfaces.
-
Maintaining a Consistent Speed and Pressure: Maintaining a consistent speed and pressure during sanding enhances surface quality. Varying the speed and pressure may lead to uneven surfaces or imperfections. A gentle, steady approach ensures that the resin is not overly abraded in certain spots, reducing the risk of unwanted scratches or marks.
What Safety Precautions Should Be Taken When Sanding Resin Models?
When sanding resin models, safety precautions are essential to prevent health risks and ensure a safe environment.
- Use a mask or respirator
- Wear safety goggles
- Use gloves
- Sand in a well-ventilated area
- Use a dust collection system
- Minimize skin contact with resin dust
- Follow manufacturer’s safety recommendations
To provide a comprehensive perspective on these precautions, it is important to understand each safety measure and its significance.
-
Use a Mask or Respirator: Using a mask or respirator is crucial when sanding resin models. These masks filter out harmful particles, preventing inhalation of resin dust. According to the American Lung Association, inhaling fine particulate matter can lead to respiratory issues. For effective protection, choose a mask rated for toxic dust.
-
Wear Safety Goggles: Wearing safety goggles protects the eyes from flying resin particles. This is important because resin dust can cause irritation or injury. The Centers for Disease Control and Prevention (CDC) stresses the importance of eye protection when handling hazardous materials.
-
Use Gloves: Using gloves helps prevent skin contact with resin dust, which may cause allergic reactions or skin irritation. Nitrile gloves are recommended, as they provide a barrier against chemical exposure, as highlighted by the Occupational Safety and Health Administration (OSHA).
-
Sand in a Well-Ventilated Area: Sanding in a well-ventilated area reduces the concentration of airborne dust. This practice helps minimize inhalation risks. The Environmental Protection Agency (EPA) suggests ensuring adequate air circulation to disperse harmful particles.
-
Use a Dust Collection System: A dust collection system effectively captures resin dust during the sanding process. This equipment further reduces airborne particles and keeps the workspace clean. Many woodworking and crafting professionals advocate for the installation of such systems to enhance safety.
-
Minimize Skin Contact with Resin Dust: Minimizing skin contact with resin dust entails using protective gear and cleaning up immediately after sanding. This measure helps avoid long-term health risks associated with chronic exposure to resin materials.
-
Follow Manufacturer’s Safety Recommendations: Following the manufacturer’s safety guidelines ensures that all specific safety considerations are met. These recommendations often include information on protective gear and best practices for sanding safely. Manufacturers provide safety data sheets indicating risks and handling procedures.
Each of these safety precautions contributes critically to minimizing risks associated with sanding resin models.
How Does Proper Sanding Influence the Overall Aesthetics of 3D Printed Objects?
Proper sanding greatly influences the overall aesthetics of 3D printed objects. Sanding helps smooth out uneven surfaces caused by the printing process. This smoothing enhances the visual appeal by preventing layer lines from being visible. It also prepares the surface for finishing techniques, such as painting or applying a clear coat.
The main components involved are the surface quality, visual texture, and finishing effects. Step one involves assessing the surface of the printed object. A rough surface typically reflects light unevenly, creating a less attractive appearance. Step two is to choose the right sandpaper grit. Coarse grit removes large imperfections, while fine grit smooths out the surface further.
Step three involves sanding technique. Applying consistent pressure and following the contours of the object contributes to a uniform finish. Step four is cleaning the surface after sanding. Removing dust ensures that paint and finish adhere properly.
By following these steps, one achieves a refined surface that enhances the object’s overall aesthetics. The result is a visually appealing 3D print with improved detail and a professional look.
Related Post: