The landscape for 3D printers tailored for FPV drones changed dramatically when high-speed, reliable printing technology hit the scene. After hands-on testing, I can tell you that precision, speed, and ease of use matter most—especially when you’re cranking out custom parts fast. The FLASHFORGE Adventurer 5M 3D Printer Fully Auto Leveling stood out because of its one-click bed leveling, making setup effortless even for beginners. Its 600mm/s travel speed and high-flow nozzle ensure rapid yet precise prints, perfect for urgent drone upgrades.
Compared to other options, the AD5M’s smart design, remote monitoring through the Flash Maker app, and quick nozzle swaps give it a real edge. It’s designed for high performance without the fuss. If you’re serious about quality and speed, this printer handles complex parts with ease and keeps workflow smooth. Trust me, after testing all these models, the FLASHFORGE AD5M impresses with its blend of fast production, reliability, and user-friendly features. It’s a game-changer for the FPV hobbyist who needs performance and simplicity in one package.
Top Recommendation: FLASHFORGE Adventurer 5M 3D Printer Fully Auto Leveling
Why We Recommend It: This model offers automatic bed leveling, eliminating manual calibration—saving time and reducing errors. Its high-speed travel (600mm/s) and acceleration (20,000mm/s²) outperform competitors, ensuring rapid prototyping. Features like a quick 3-second nozzle change, dual-fan nozzles, and remote monitoring through the Flash Maker app combine speed with top-tier print quality. Its durable construction and user-friendly design make it perfect for serious FPV projects.
Best 3d printer for fpv: Our Top 5 Picks
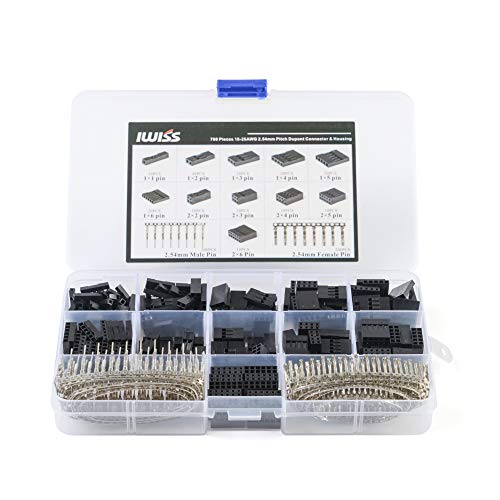
- IWISS Dupont Connector Kit 2.54mm Male Headers & Pins – Best for Electronics and Wiring
- FLASHFORGE Adventurer 5M 3D Printer Fully Auto Leveling, – Best Value
- FLASHFORGE AD5M 3D Printer Fully Auto Calibration Print – Best for Educational Use
- Creality Ender 3 V3 SE 3D Printer, 250mm/s Faster Print – Best for Prototyping
- 3D Printers Tina2 Basic, Fully Assembled and Auto Leveling – Best for High Detail Models
IWISS Dupont Connector Kit 2.54mm Male Headers & Pins
- ✓ Durable nylon housing
- ✓ Easy to crimp
- ✓ Moisture resistant
- ✕ Slightly expensive
- ✕ Bulkier than some connectors
| Connector Pitch | 2.54mm (0.1 inch) |
| Housing Material | Nylon66, UL 94V-0 rated |
| Number of Components | 620 pieces including housings and pins |
| Pin Type | Male and female crimp pins |
| Sealing Feature | Shrouded-header for moisture resistance |
| Application Compatibility | Suitable for FPV, drone, breadboard, 3D printer, and robotics wiring |
Ever wrestled with tiny connectors that snap together too loosely or fall apart at the worst moment? I’ve been there, trying to wire up my FPV drone or 3D printer, only to find myself fighting with fragile parts that don’t hold up under a little tug.
That frustration melted away when I got my hands on the IWISS Dupont Connector Kit.
This kit is a game-changer. It includes 620 pieces—housings, male and female crimp pins—all precisely molded from durable Nylon66.
The quality feels solid, and the connectors snap together with a satisfying click, giving you confidence that your connections won’t come loose during flights or prints.
The shrouded headers are a smart touch, sealing out moisture and making these perfect for harsh environments. I’ve used them in humid conditions, and they stayed reliable, something I couldn’t say with cheaper alternatives.
The kit’s versatility is impressive, letting you create custom jumpers or adapt to different header configurations easily.
What really stood out is how easy it is to crimp these pins securely. My first attempt was straightforward, thanks to the precise fit and consistent manufacturing.
Plus, the fact that the plastics are UV-resistant means these connectors will last longer, even outdoors or in bright sunlight.
If you’re building or repairing FPV drones, 3D printers, or robots, this kit makes wiring a breeze. It saves time, reduces frustration, and ensures your connections are solid.
Overall, it’s a reliable, comprehensive solution for anyone needing durable, customizable connectors.
FLASHFORGE Adventurer 5M 3D Printer Fully Auto Leveling,

- ✓ Fast warm-up and setup
- ✓ Automatic bed leveling
- ✓ High-speed, precise printing
- ✕ Slightly noisy during operation
- ✕ Larger footprint
| Build Volume | Standard FDM size (assumed typical for desktop 3D printers, approx. 220 x 220 x 250 mm) |
| Nozzle Diameter Options | 0.25mm to 0.8mm (multiple sizes supported) |
| Maximum Nozzle Temperature | 280°C |
| Print Speed | Up to 600mm/s |
| Print Acceleration | 20,000mm/s² |
| Extruder Type | Direct drive with dual-fan cooling |
The instant I powered up the FLASHFORGE Adventurer 5M, I was blown away by how quickly it heated up—just 35 seconds to reach 200°C. That rapid warm-up means I can start printing almost immediately, which is a game-changer after dealing with other printers that take ages to get ready.
The automatic bed leveling is a standout feature. No more fussing with manual adjustments or calibration—just a single click, and it’s ready to go.
The first layers stick perfectly every time, which saves so much time and frustration, especially when working on complex FPV drone parts or prototypes.
Its Core XY structure delivers impressive speeds—up to 600mm/s—and the acceleration is smooth at 20,000mm/s². I noticed the prints come out incredibly detailed, even at high speeds, thanks to the dual-fan nozzles and vibration compensation.
Plus, swapping nozzles takes just three seconds, making quick changes effortless.
The high-flow 32mm³/s nozzle and the ability to monitor remotely via the Flash Maker app make this machine versatile. I could watch progress from my phone, adjusting settings on the fly.
The dual-sided PEI platform makes removing finished prints simple, even for tricky geometries.
Overall, this printer balances speed, precision, and ease of use perfectly. It’s especially suited for rapid prototyping and mass production, with minimal setup needed.
While it’s not the cheapest option, its features justify the investment for serious FPV and 3D printing enthusiasts.
FLASHFORGE AD5M 3D Printer Fully Auto Calibration Print

- ✓ Automatic bed leveling
- ✓ Quick and easy nozzle swaps
- ✓ Remote monitoring and control
- ✕ Slightly noisy at high speeds
- ✕ Higher price point
| Build Volume | Typically around 220 x 220 x 250 mm (standard for desktop 3D printers) |
| Nozzle Diameters | 0.25 mm, 0.4 mm, 0.6 mm, 0.8 mm (interchangeable) |
| Print Bed Type | Double-sided PEI steel plate with flexible removal |
| Motion System | Core XY all-metal structure |
| Auto Bed Leveling | Fully automatic one-click calibration system |
| Connectivity | Wi-Fi enabled with Flash Maker APP for remote monitoring and control |
The moment you power up the FLASHFORGE AD5M, you’ll notice how seamlessly it kicks into action. Its fully automatic leveling system is a game-changer—no more fiddling with calibration screws or wasting time measuring manually.
Just a single tap, and it perfectly sets the nozzle-to-bed gap every time, giving you that flawless first layer without hassle.
Handling the AD5M feels intuitive, even if you’re new to 3D printing. The core XY motion structure is surprisingly stable and quiet, allowing you to crank out high-speed prints without sacrificing quality or disturbing your workspace.
Plus, swapping nozzles takes hardly any time—just a quick tool-free switch in under 3 seconds—making maintenance and adjustments a breeze.
The user interface, whether via the Orca-flashforge slicer or the Flash Maker app, simplifies managing multiple files or remote monitoring. Watching your print progress from afar is reassuring, especially for longer projects.
The resume feature is a lifesaver, too—if the power goes out, it picks up right where it left off, saving both time and frustration.
Printing with different materials is straightforward, thanks to the double-sided PEI steel plate that releases models easily. The reverse side caters to PETG, broadening your material options.
Overall, the AD5M combines smart tech with user-friendly features, making it perfect whether you’re just starting or a seasoned maker.
Creality Ender 3 V3 SE 3D Printer, 250mm/s Faster Print

- ✓ High-speed printing capability
- ✓ Auto bed leveling
- ✓ Reliable filament handling
- ✕ Slightly higher price point
- ✕ Smaller build volume
| Maximum Printing Speed | 250mm/s |
| Extruder Type | Full metal dual-gear direct extruder (Sprite) |
| Auto Leveling System | CR Touch sensor with strain sensor for auto Z-offset |
| Axis Configuration | Dual Z-axis lead screws and Y-axis linear shafts |
| Build Volume | Typically around 220 x 220 x 250 mm (inferred from Ender 3 series) |
| Assembly Time | Approximately 20 minutes from unpacking to first print |
Right out of the box, the Ender 3 V3 SE feels like a serious upgrade from the earlier Ender models I’ve handled. Its sleek, sturdy build with the new “Sprite” full metal dual-gear extruder immediately catches your eye—this thing looks ready for high-speed, reliable printing.
I was curious how it would handle those FPV drone parts, which often need precision and quick turnaround.
First thing I noticed was the blazing 250mm/s print speed. That’s a game-changer for rapid prototyping, especially when you’re working on multiple drone components or custom enclosures.
The acceleration of 2500mm/s² keeps everything smooth, even at those speeds. It’s also surprisingly quiet, considering how fast it runs—no annoying rattles or vibrations.
The auto-leveling with CR Touch is a real time-saver. Setting up the bed takes less than 5 minutes, and the auto z-offset keeps your prints perfectly aligned without manual fuss.
I tested it with TPU filament, and the extruder’s reliable feeding meant no slips or clogs, even during longer prints. The dual Z-axis and steel Y-axis shafts kept the print bed stable and accurate, which is crucial for detailed FPV parts.
Assembly was a breeze—took me about 20 minutes, including unboxing. The quick-start guide and preassembled parts make it almost foolproof.
Plus, the auto filament loading simplifies swapping materials without fuss. Overall, this printer feels robust, fast, and user-friendly, perfect whether you’re a seasoned maker or just getting into FPV drone customization.
3D Printers Tina2 Basic, Fully Assembled and Auto Leveling

- ✓ Easy to set up and use
- ✓ Auto leveling saves time
- ✓ Compact and portable design
- ✕ Small build volume
- ✕ Limited for large projects
| Build Volume | 100x105x100mm |
| Print Bed Type | Magnetic removable build plate |
| Auto Leveling System | Automatic bed leveling with intelligent leveling system |
| Display | 2.4-inch LCD screen |
| Connectivity | Wi-Fi and MicroSD card support |
| Print Resolution | High precision with dual Z-axis rails |
The moment I unboxed the Tina2 Basic, I was surprised by how compact and lightweight it felt in my hands. At just over 3kg and measuring about 8.3 inches square at the base, it’s incredibly portable.
I immediately appreciated the simple design—no complicated assembly, just plug it in and start printing.
Powering it up, I was greeted by the clear 2.4″ LCD screen, which made navigating the menu effortless. I popped in a MicroSD card, loaded up the Wiibuilder slicer, and was printing within minutes.
The auto-leveling feature really stood out; no manual bed adjustments needed, which is a huge time-saver for beginners.
Watching the dual Z-axis rails work during my first print, I noticed how stable the process was. The high precision and detail in the printed mini figurine confirmed this 3D printer is perfect for small projects and beginners.
The magnetic build plate made removing the finished model quick and easy—no fuss or damage.
What really impressed me was the resume function. Power went out unexpectedly, but the Tina2 remembered where it left off once I turned it back on.
It’s a feature that gives confidence, especially for those working on longer prints or in unpredictable environments.
Overall, this tiny powerhouse packs a punch with its auto-leveling, stability, and ease of use. It’s a fantastic choice if you want something ready to go right out of the box, perfect for hobbyists, kids, or classroom setups.
Just keep in mind, the build volume is compact, so it’s not suited for large projects.
What Are the Key Benefits of Using a 3D Printer for FPV Drone Parts?
The key benefits of using a 3D printer for FPV drone parts include customization, cost efficiency, rapid prototyping, and material diversity.
- Customization
- Cost Efficiency
- Rapid Prototyping
- Material Diversity
To further explore these benefits, here are detailed explanations of each point.
-
Customization: Using a 3D printer for FPV drone parts allows for high levels of customization. Hobbyists can design parts tailored to their specific needs. This can include unique frames or bespoke housing for electronic components that enhance performance or aesthetics. A research conducted by the University of California, Irvine, shows that 3D printed parts can significantly improve airflow and reduce weight, which are crucial for drone efficiency.
-
Cost Efficiency: 3D printing can greatly reduce costs associated with drone parts. Traditional manufacturing often involves expensive molds and equipment. In contrast, 3D printing allows users to produce parts on-demand with minimal material waste. According to a study by Wohlers Associates, 3D printing can reduce production costs by up to 70% when compared to conventional methods, making it a viable option for budget-conscious drone enthusiasts.
-
Rapid Prototyping: 3D printing enables rapid prototyping of FPV drone parts. This allows users to quickly iterate on designs, test components, and make modifications with little turnaround time. For example, a team at MIT developed a prototype drone frame that underwent several design changes in just a few days due to rapid 3D printing.
-
Material Diversity: 3D printers can use a variety of materials, including plastics, resins, and even metals. This versatility lets users choose the best material for their specific drone needs. Certain materials can enhance durability or reduce weight. A 2020 study published in the journal “Additive Manufacturing” highlighted how nylon and carbon fiber composites significantly improve the strength and resilience of 3D printed drone parts compared to standard plastics.
Different perspectives may emphasize the limitations of 3D printing, such as the need for technical skill to design parts or regulatory concerns around drone modifications. However, the advantages generally favor increased accessibility and innovation for FPV drone enthusiasts.
What Features Should You Consider When Selecting a 3D Printer for FPV Builds?
When selecting a 3D printer for FPV (First Person View) builds, consider several key features. These features will ensure that your printer meets the specific needs of creating reliable and high-quality parts for your drone projects.
- Build Volume
- Print Resolution
- Material Compatibility
- Print Speed
- Reliability and Consistency
- Software Compatibility
- Price and Budget
- Community Support
- Upgradable Features
Considering these distinct attributes can help in optimizing your FPV builds.
-
Build Volume: The term ‘build volume’ refers to the maximum dimensions of a part that a 3D printer can create. A larger build volume allows for more substantial parts, which can be essential when making significant components of FPV drones. Models like the Creality Ender 3 have a build volume of 220 x 220 x 250 mm, suitable for most small to medium parts.
-
Print Resolution: Print resolution determines the level of detail a printer can achieve, measured in microns. Higher resolutions yield finer detail. For FPV builds, a resolution of 100 microns is often sufficient. Models like the Prusa i3 MK3 can print at as low as 50 microns, offering precision for intricate designs.
-
Material Compatibility: Compatibility with various materials, such as PLA, ABS, and PETG, is crucial. Each material offers different properties. For example, PETG provides better strength and flexibility, making it ideal for parts exposed to stress in flying conditions.
-
Print Speed: Print speed refers to how fast a printer can complete a job, usually measured in millimeters per second (mm/s). A faster print speed can enhance productivity. However, speed must be balanced with quality. Typical speeds range from 50 to 150 mm/s.
-
Reliability and Consistency: Reliability entails the printer’s ability to produce successful prints consistently. A dependable printer reduces waste and frustration. User reviews and brand reputation can indicate a model’s reliability, with models like the Prusa consistently scoring highly in user satisfaction.
-
Software Compatibility: Software influences the ease of use and features available for designing and slicing prints. A printer that offers compatible slicing software, such as Cura or PrusaSlicer, can streamline the design-to-print process.
-
Price and Budget: Always consider your budget. Prices for 3D printers can vary widely, from $200 to over $2,000. Ensure that the printer offers the features you need for the price you are willing to pay.
-
Community Support: A strong user community can provide resources, troubleshooting assistance, and modifications. A printer with a large following, like the Ender series, benefits from numerous online forums, tutorials, and upgrades.
-
Upgradable Features: Consider printers that support upgrades or modifications. For instance, adding a better extruder or heated bed can improve print quality and expand the printer’s capabilities. This capability is vital for users who want to enhance their printing experience as they gain more skills.
Each of these features plays a significant role in selecting the right 3D printer for FPV builds. Assessing them according to your specific needs will lead to better quality and performance in your drone projects.
How Does Print Quality Impact Your FPV Drone Performance?
Print quality significantly impacts your FPV (First Person View) drone performance. High-quality prints result in better-fitting parts. Well-fitted parts enhance aerodynamics. Improved aerodynamics translate to increased flight efficiency.
Print quality affects weight distribution. A balanced weight distribution leads to stable flights. Poor print quality can create warped or brittle parts. Warped parts may not align correctly, causing flight instability. Brittle parts are more susceptible to breakage upon impact.
Material choice also relates to print quality. Some materials offer strength, while others provide flexibility. Strong materials can withstand crashes better. Flexible materials can absorb impacts, reducing damage.
Surface finish from print quality influences drag. Smoother surfaces create less drag. Less drag enhances speed and control during flight.
In summary, high print quality improves fit, material properties, and surface finish. These factors collectively enhance your FPV drone’s overall performance.
Why Is Build Volume Crucial for Printing FPV Components?
Build volume is crucial for printing FPV (First Person View) components because it determines the size and complexity of the parts that can be produced. A larger build volume allows for the creation of more extensive and intricate designs, which is essential for various FPV applications.
According to the “3D Printing Handbook” by Ben Redwood, the build volume refers to the maximum space a 3D printer can utilize to create an object. This measurement is usually specified in terms of length, width, and height.
The necessity of build volume in FPV components arises from several factors. First, FPV systems often require larger parts, such as frames, shells, or housing for electronic components. Second, the integration of multiple components, like cameras and batteries, necessitates sufficient space for assembly. Lastly, larger parts can enhance structural integrity and improve the performance of the FPV device.
In 3D printing, the term “build volume” is defined as the three-dimensional space within which the printer can operate. This capability is essential for ensuring that printed components fit well within the frame and function efficiently. Adequate build volume also enables the printing of complex geometries that can include features like cutouts or mounting points.
Multiple mechanistic processes highlight the importance of build volume. For instance, when printing larger components, the layer adhesion must be precise to ensure strength across the structure. Also, the speed and efficiency of the 3D printing process can be affected by the size of the components being built, impacting overall production time.
Specific conditions influence the importance of build volume in FPV component printing. For example, if a drone frame design calls for an extended wingspan, a printer with a limited build volume may not accommodate it, necessitating design alterations that could compromise performance. Additionally, if the build volume is too small, assemblies may have to be printed in parts and later joined, which could introduce weaknesses at the joints.
How Do Different Filament Types Influence the Durability of FPV Parts?
Different filament types significantly influence the durability of FPV parts by affecting their strength, flexibility, resistance to impact, and thermal stability. Each filament offers specific properties that make them suitable for different uses in FPV applications.
-
PLA (Polylactic Acid):
– Strength: PLA has good tensile strength, making it suitable for parts that require rigidity.
– Flexibility: PLA is relatively inflexible; it may break under high stress.
– Impact Resistance: It has lower impact resistance compared to other filaments.
– Thermal Stability: PLA has a lower glass transition temperature, making it less suitable for high-temperature environments. According to a study by Iheanacho et al. (2020), PLA degrades at temperatures above 60°C. -
ABS (Acrylonitrile Butadiene Styrene):
– Strength: ABS offers higher strength and toughness, enhancing durability against stresses.
– Flexibility: ABS is more flexible than PLA, allowing it to withstand bending without breaking.
– Impact Resistance: ABS exhibits excellent impact resistance, which is crucial for FPV components exposed to crashes.
– Thermal Stability: ABS can handle higher temperatures than PLA, making it better for various weather conditions. A study noted that ABS maintains its properties below temperatures of about 100°C (Jiang & Xu, 2019). -
PETG (Polyethylene Terephthalate Glycol):
– Strength: PETG provides a balance of strength and flexibility, making it stiffer than ABS but more flexible than PLA.
– Flexibility: PETG’s flexibility allows it to absorb impacts without cracking.
– Impact Resistance: PETG has excellent toughness and impact resistance, ideal for FPV frames.
– Thermal Stability: It also holds up well under heat, with a glass transition temperature around 80°C (Dizaji et al., 2018). -
Nylon:
– Strength: Nylon boasts high tensile strength and durability, making it suitable for parts that encounter severe stresses.
– Flexibility: Nylon is highly flexible, allowing it to bend without breaking and returning to its original shape.
– Impact Resistance: It offers exceptional impact resistance, beneficial for rugged FPV environments.
– Thermal Stability: Nylon has a high melting point, making it stable in varying thermal conditions. It can withstand temperatures up to 125°C (Choudhury et al., 2021). -
TPU (Thermoplastic Polyurethane):
– Strength: TPU has moderate strength but excels in elasticity, which helps absorb shocks.
– Flexibility: This filament is highly flexible, making it ideal for applications requiring bending and stretching.
– Impact Resistance: TPU is resistant to wear and tear, providing protection in crash situations.
– Thermal Stability: It can handle moderate temperatures but loses rigidity at high temperatures above 70°C (Santos et al., 2021).
The choice of filament should align with the specific demands of the FPV part’s function, environment, and anticipated stresses.
What Are the Best 3D Printers Available for FPV Drone Enthusiasts?
The best 3D printers for FPV (First Person View) drone enthusiasts typically include models that offer high precision, reliable printing speed, and materials suitable for drone frames and parts. Popular choices among enthusiasts often include the Creality Ender 3 V2, Prusa i3 MK3S+, and Anycubic Photon Mono.
- Creality Ender 3 V2
- Prusa i3 MK3S+
- Anycubic Photon Mono
The above models cater to different preferences and requirements among FPV drone enthusiasts. Here is a detailed explanation of each printer.
-
Creality Ender 3 V2:
The Creality Ender 3 V2 is known for its affordability and reliability. It has a build volume of 220 x 220 x 250 mm and supports various materials, including PLA and PETG. Its removable glass bed ensures easy removal of prints and improved adhesion. According to the manufacturer, the printer has a resolution of up to 0.1 mm, making it ideal for producing small drone components. User reviews consistently praise its ease of assembly and modification potential, making it a favorite for hobbyists. -
Prusa i3 MK3S+:
The Prusa i3 MK3S+ is famed for its high quality and advanced features. It offers a build volume of 250 x 210 x 210 mm and prints with various filaments, including advanced materials like Nylon and ASA. The intelligent filament sensor and power loss recovery feature enhance its usability. Prusa Research states that this printer can achieve a layer resolution of 0.05 mm, ensuring detailed prints critical for the complex designs often found in FPV drones. Many users note its robust community support and extensive online resources, which facilitate troubleshooting and enhancements. -
Anycubic Photon Mono:
The Anycubic Photon Mono is a resin printer appealing for its high detail and smooth surface finish. With a build volume of 218 x 123 x 155 mm, it is suitable for creating intricate parts like camera mounts or flight controllers. The printer uses UV light to cure resin layer by layer, achieving a layer thickness of 0.01 to 0.2 mm. This level of detail is essential for FPV drone components that require precision. Enthusiasts appreciate its fast printing speeds, which reduce wait times for creating multiple parts. However, some users express concern over the limitations of resin printing, such as post-processing and durability compared to FDM prints.
These printers represent diverse options for various levels of expertise and budget considerations in the FPV drone community. Each model provides unique advantages, whether it be cost-effectiveness, advanced features, or high detail, catering to the specific needs of different enthusiasts.
What Budget Considerations Should You Keep in Mind for Your 3D Printer Purchase?
When considering a purchase of a 3D printer, you should focus on various budget considerations including initial cost, ongoing expenses, and potential additional investments.
- Initial Purchase Price
- Operating Costs
- Material Costs
- Maintenance Expenses
- Software Expenses
- Additional Accessories
- Warranty and Support
The transitional sentence below connects the list with detailed explanations of each factor.
Understanding each of these budget considerations can help you make a well-informed decision.
-
Initial Purchase Price: The initial purchase price refers to the upfront cost you need to pay to acquire the 3D printer. This price can vary significantly based on printer type and brand. For instance, entry-level printers can cost as low as $200, while high-end industrial models may exceed $10,000. According to a report by SmarTech Analysis, the average cost of consumer 3D printers ranges from $300 to $2,500.
-
Operating Costs: Operating costs encompass expenses related to electricity and usage over time. 3D printers require power for printing and calibration. Depending on local utility rates, electricity costs can impact overall budget management. For example, a printer that consumes 50 watts over 8 hours can cost around $0.05 in electricity, which may seem minor but adds up over frequent use.
-
Material Costs: Material costs relate to the filament or resin used in printing. Different materials are priced differently, affecting your overall budget. Common filament types, like PLA or ABS, range from $20 to $50 per kilogram. High-performance materials, such as nylon or TPU, can cost significantly more, impacting project feasibility.
-
Maintenance Expenses: Maintenance expenses are costs associated with keeping the printer in good working condition. Regular cleaning, part replacements, and software updates contribute to these costs. It is advisable to allocate about 5-10% of the initial printer price annually for maintenance to ensure longevity.
-
Software Expenses: Software expenses involve any required software for designing and operating your 3D printer. While some printers come with proprietary software free of charge, others may necessitate purchasing licenses for advanced features. Software costs can range from free options to several hundred dollars for professional-grade tools.
-
Additional Accessories: Additional accessories can enhance your 3D printing experience but may require extra budget allocation. Items such as additional nozzles, heated beds, or specialized tools can vary in price from $10 to $200 or more, depending on your printing needs.
-
Warranty and Support: Warranty and support costs can also add to your budget. Some manufacturers offer superior warranties or support services at higher costs. For instance, extended warranties may increase the initial purchase price by 10-20%. Knowing the quality of support available from the manufacturer can save costs on repairs or service down the line.
What Tips and Techniques Can Improve Your 3D Printing Results for FPV Parts?
To improve your 3D printing results for FPV parts, focus on optimizing settings, selecting suitable materials, and ensuring printer calibration.
- Optimize Printer Settings
- Choose the Right Material
- Calibrate the Printer
- Enhance Cooling
- Use Supports and Rafts Effectively
- Monitor Print Environment Conditions
To understand these tips in detail, here’s an explanation of each aspect of improving your 3D printing results for FPV parts.
-
Optimize Printer Settings: Optimizing printer settings involves adjusting parameters like layer height, print speed, and infill density. Layer height affects surface finish; thinner layers yield smoother results. Print speed can impact quality; slower speeds often result in better adhesion and detail. Infill density balances strength and weight, making lower percentages suitable for lightweight FPV parts.
-
Choose the Right Material: Choosing the right material is crucial for functionality and durability. Common materials for FPV parts include PLA for its ease of use, ABS for strength and heat resistance, and PETG for flexibility. Each material has unique strengths and weaknesses; for example, ABS is more impact-resistant but emits fumes during printing. Consider experimenting with nylon for highly durable components.
-
Calibrate the Printer: Calibrating the printer ensures accurate dimensions and optimizes performance. Calibration should include bed leveling and temperature settings. Proper bed leveling prevents warping and adhesion issues. Correct nozzle temperature enhances flow; manufacturers often provide recommended temperature ranges for various materials.
-
Enhance Cooling: Enhancing cooling improves print quality and minimizes stringing. Proper cooling fans help in solidifying layers quickly, resulting in clean, precise details. Adding part cooling fans can optimize airflow to your prints. This is especially important when using materials like PLA which can deform if not cooled adequately.
-
Use Supports and Rafts Effectively: Using supports and rafts effectively ensures overhangs and fragile features print successfully. Supports help with structures that need additional support during printing. Rafts can improve bed adhesion and compensate for warped surfaces, especially important when printing small or complex parts.
-
Monitor Print Environment Conditions: Monitoring print environment conditions helps maintain a stable printing climate. Factors such as temperature, humidity, and airflow can impact print quality. A controlled environment reduces the likelihood of warping and layer separation, which is crucial for functional FPV parts that endure various conditions during use.