Before testing this ultrasonic cleaner, I didn’t realize how much residue and tiny print imperfections could ruin my models. I used to spend ages cleaning by hand, risking missed spots and damaged details. When I tried the UniFormation W230 Cleaner for Ultrasonic 3D Resin, everything changed. The powerful 40kHz ultrasonic vibrations cleaned every nook and cranny in seconds, and the large 7L tank handled bigger prints effortlessly.
What truly impressed me was how easy it was to operate. The LED touchscreen made setting time simple, and the flexible cleaning options—submerging the build plate or using the basket—saved me time. Plus, the sealed design prevented splashing, making it safer and less messy. It’s a major upgrade over smaller or less durable models, and I found it cleaned my resin prints with precision, leaving no residue behind. This cleaner genuinely simplifies post-processing, giving pro-quality results at home. Trust me, once you experience its deep cleaning power, you won’t want to go back!
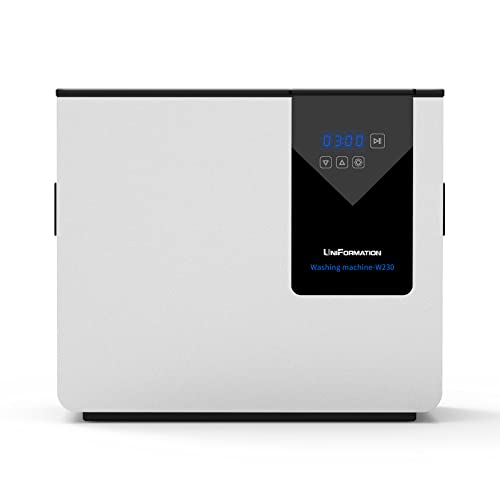
Top Recommendation: UniFormation W230 Cleaner for Ultrasonic 3D Resin
Why We Recommend It: This model outperforms others with its 40kHz ultrasonic transducers, large 7L capacity, and user-friendly LED touch screen. It offers versatile cleaning options and a sealed, splash-proof design that prevents messes. Compared to smaller or less durable competitors, it handles bigger prints effectively and makes post-print cleaning quick and thorough.
Best 3d printer sonic cleaner: Our Top 5 Picks
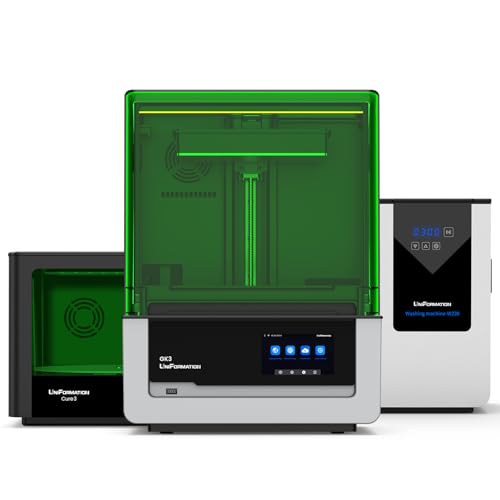
- UniFormation GK3Pro 3D Resin Printer & Curing Kit – Best for Resin Post-Processing
- Uniformation W230 Cleaner for Ultrasonic 3D Resin – Best Resin Cleaner
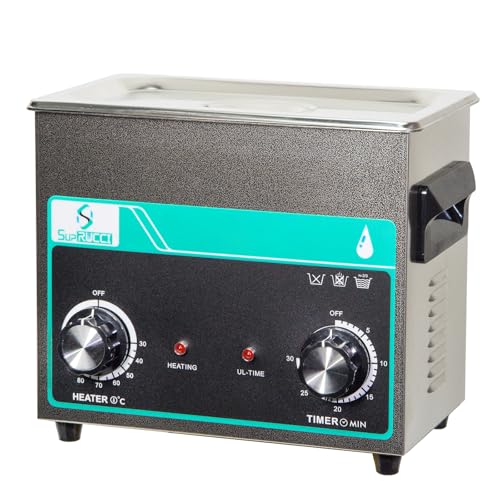
- SUPRUCCI 3L Ultrasonic Cleaner with Heater & Timer – Best Ultrasonic Wash Station
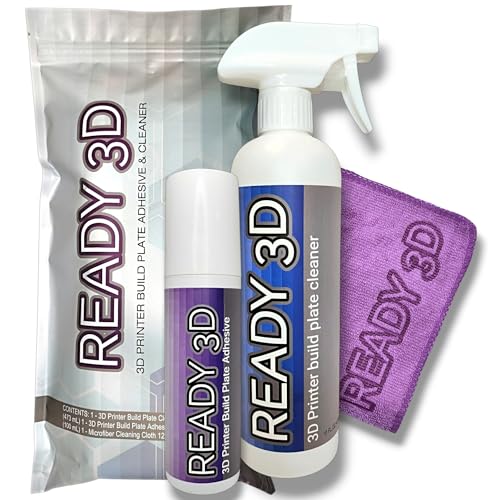
- Ready 3D Build Plate Adhesive & Cleaner – Best 3D Printer Part Removal Tools
- Cregrant3D Vacuum Cleaner for 3D Printer & Laser Engraver – Best 3D Printer Cleaning Solution
UniFormation GK3Pro 3D Resin Printer and Ultrasonic Cleaner
- ✓ Ultra-high-resolution display
- ✓ Large curing and build space
- ✓ Fast, efficient ultrasonic cleaning
- ✕ Heavier than typical cleaners
- ✕ Higher price point
| Display | 9.6-inch 16K UHD resolution screen with 15120 x 6230 pixels |
| XY Resolution | 14 x 19 μm |
| Build Volume | 211 x 118 x 240 mm |
| Light Source Wavelength | 385nm COB LED |
| Curing Space | 282 mm diameter x 162 mm height |
| Ultrasonic Frequency | 40 kHz |
>
Walking into my workspace, I couldn’t help but notice how sleek the UniFormation GK3Pro looks, especially the massive 9.6-inch 16K UHD screen. Its resolution is stunning—the details on tiny resin models now pop with near-microscopic clarity.
Handling the resin vat and the curing station, I immediately appreciated the sturdy build and thoughtful layout, making setup feel almost effortless.
Printing with the GK3Pro felt incredibly precise. Thanks to the 14 x 19 μm XY resolution, even the tiniest filigree on my models turned out crisp.
The large build volume of 211 x 118 x 240 mm means I can print bigger models or batch several parts without fuss. The 385nm COB light source delivers consistent, sharp cures with uniform light distribution, which is a game-changer for detailed projects.
Plus, the Fresnel lens system really minimizes distortion, so every layer is perfectly formed.
Switching to the UniFormation Cleaner, I was impressed by how quickly it cleaned my prints. The ultrasonic vibration at 40kHz zips through resin residue, making even complex parts spotless in seconds.
The heated drying feature is a bonus—three minutes is usually enough, but I like having the option to extend it if needed. The safety trigger that prevents operation when the lid is open adds peace of mind.
Overall, combining these tools has transformed my resin printing process. The precision, speed, and ease of use are noticeable from the first print to the final clean-up.
It’s a seamless setup for anyone serious about high-quality resin models.
<
Uniformation W230 Cleaner for Ultrasonic 3D Resin
- ✓ Powerful ultrasonic cleaning
- ✓ Large 7L capacity
- ✓ Easy-to-use touchscreen
- ✕ Pricey for hobbyists
- ✕ Requires liquid + cleaner
| Ultrasonic Frequency | 40 kHz |
| Tank Capacity | 7 liters |
| Control Interface | LED touch screen |
| Washing Cycle Duration | 0-10 minutes (typical cycle 3 minutes) |
| Compatibility | Supports GKTwo build plate and most DLP/SLA 3D printers |
| Material | Corrosion-resistant materials |
After hearing so much about ultrasonic resin cleaners, I finally got my hands on the Uniformation W230, and I was eager to see if it could truly streamline my post-print cleanup. From the moment I unpacked it, I appreciated its robust build and the sleek, corrosion-resistant design that felt sturdy and professional.
The 7L capacity is a game-changer—big enough to handle larger prints without splitting them up. I tested it with some sizable SLA models, and the deep ultrasonic vibrations at 40KHZ made quick work of stubborn resin remnants.
It’s almost magical how the cleaner reaches every nook and cranny, leaving prints pristine in just a few minutes.
The dual washing options are super handy. Using the dedicated slot for the build plate worked flawlessly—submerging the entire plate for thorough cleaning.
When I needed to clean small parts separately, the mesh basket kept everything secure while I washed. Plus, the clamshell lid kept splashes at bay, which is a relief for messy projects.
The intuitive LED touch screen makes setting cycles a breeze. I set it for 3 minutes, and it automatically did its thing, saving me time and effort.
Draining the fluid is simple thanks to the dedicated port, and I felt safe knowing it’s built to prevent splashes and volatilization.
Overall, this cleaner made my workflow smoother and less messy. It’s a solid upgrade for anyone serious about quality and efficiency in resin post-processing.
The only downside? The price might be a stretch for hobbyists, but for professional use, it’s worth every penny.
SUPRUCCI 3L Ultrasonic Cleaner with Heater & Timer
- ✓ Durable stainless steel build
- ✓ Powerful ultrasonic transducers
- ✓ Easy knob controls
- ✕ Slightly bulky size
- ✕ Limited to small to medium items
| Tank Capacity | 3 liters (9.5″ x 5.5″ x 3.9″) |
| Material | SUS304 stainless steel, 0.66mm thickness |
| Ultrasonic Transducers | 2 industrial-grade transducers, 120W each |
| Temperature Control | Adjustable via knob, specific range not specified |
| Timer Control | Adjustable via knob, specific range not specified |
| Application Compatibility | Suitable for jewelry, coins, 3D resin printed parts, metal components, and other small items |
Imagine you’re in your workshop, trying to clean a batch of resin 3D printed parts before the next project. You fill the SUPRUCCI 3L Ultrasonic Cleaner with warm water, toss in your parts and a bit of cleaning solution, then set the timer and temperature with a quick turn of the knob.
The tank size is surprisingly spacious—almost 10 inches long—so you can fit multiple items at once without much fuss. The stainless steel construction feels sturdy and high-quality, and the 0.66mm SUS304 material gives you confidence it’ll last through regular use.
Using the ultrasonic transducers, you instantly notice how effective the cleaning is. The vibrations loosen stubborn resin residue and grime, even on tricky corners.
The digital control makes it easy to tweak the settings without fumbling around, saving you time during busy days.
Cleaning jewelry, coins, or even small metal parts? No problem.
The wide application makes this a versatile tool. Plus, the included stainless steel basket keeps your items secure and makes removal a breeze.
Overall, this ultrasonic cleaner feels like a reliable partner for keeping your 3D printer parts, jewelry, or small hardware spotless. It’s durable, easy to operate, and powerful enough to handle multiple items at once.
Just keep in mind, the size might be a little tight if you’re cleaning larger objects or a big batch in one go.
Ready 3D Build Plate Adhesive & Cleaner
- ✓ Easy to apply and clean
- ✓ Versatile for multiple filaments
- ✓ No harsh chemicals
- ✕ Slightly pricey
- ✕ Needs reapplication for long prints
| Application Surface Compatibility | Suitable for various 3D printer build plates including PLA, ABS, PETG, ASA, TPU, and more |
| Adhesive Type | Spray-on build plate adhesive with long-lasting sponge applicator |
| Cleaning Method | Use of Ready 3D cleaner with microfiber cloth for surface preparation |
| Chemical Composition | Non-toxic, odorless, free from petroleum distillates, ammonia, chlorine, and strong acids |
| Application Efficiency | One application supports multiple prints with superior first layer adhesion |
| Drying and Release Characteristics | Dries clear, provides easy release when cooled, and prevents warping |
When I first unscrewed the cap of the Ready 3D Build Plate Adhesive, I immediately noticed how smooth and thick the formula was. It has a slightly glossy, gel-like texture that feels substantial yet easy to spread.
Applying it with the included sponge applicator was a breeze. The adhesive goes on cleanly without any drips or mess, leaving a thin, even layer on my build plate.
It dries quickly and leaves no annoying flakey residue behind.
What really stood out is how versatile it is across different filament types like PLA, ABS, PETG, and even flexible TPU. I was able to use it for longer prints and small surface contact parts without worrying about warping or poor adhesion.
Plus, the fact that it’s made in the USA with high-quality materials gives a nice sense of reliability.
After a print, the built-in cleaner made cleanup effortless. I simply sprayed or wiped off the residual adhesive with the microfiber cloth and the build plate looked brand new—no damage or sticky spots.
The cleaner’s odorless, non-toxic formula is a huge plus, especially if you’re sensitive to fumes.
Overall, this combo offers a solid solution for consistent first layers and easy maintenance. It feels premium, works well with multiple filaments, and doesn’t leave a mess or harsh chemicals behind.
If perfect first layers are your goal, this set is a real game changer.
Cregrant3D Vacuum Cleaner for 3D Printer and Laser Engraver

- ✓ Powerful 4000Pa suction
- ✓ Compact and lightweight
- ✓ Multi-functional with blowing
- ✕ Battery life could improve
- ✕ Smaller dust container
| Suction Power | 4000Pa |
| Power Source | Rechargeable battery |
| Portability | Handheld, lightweight design |
| Cleaning Modes | Vacuuming and blowing functions |
| Application Compatibility | Suitable for 3D printers and laser engravers |
| Additional Features | One-click dust removal, easy access to corners and gaps |
Unboxing the Cregrant3D Vacuum Cleaner feels like holding a sleek, compact gadget designed for serious cleanup work. Its matte black finish and ergonomic shape make it comfortable to grip, and at just the right weight, it feels balanced in your hand.
As I turned it on for the first time, I was surprised by how powerful that little device was—immediately drawing in dust and debris with minimal effort.
The 4000Pa suction is a game-changer. It can easily handle the tiny particles of filament dust and stubborn resin residue that can clutter your workspace.
The built-in blowing function is a nice touch, letting me clear out hard-to-reach spots or blow away smoke from laser engraving without switching tools. It’s lightweight enough to maneuver around intricate models or deep printer gaps, yet sturdy enough to feel durable.
Using it feels intuitive. The one-click dust removal button is responsive, and the nozzle design gives direct access to every corner of my 3D printer and engraver.
I appreciated how quickly it cleaned up after a session—no more scattered debris or lingering smoke. Plus, the rechargeable battery means I don’t have to worry about cords tangling or running out of power mid-clean.
Overall, this vacuum turns what used to be a chore into a quick, simple task. It’s versatile enough for both 3D printing and laser engraving cleanup, saving me time and mess.
Whether I’m tidying up filament scraps or clearing away smoke, it performs reliably and efficiently, making it a handy addition to my workspace.
What Is a 3D Printer Sonic Cleaner, and Why Do You Need It for Resin Prints?
A 3D printer sonic cleaner is a device that uses ultrasonic waves to clean resin prints. It operates by generating high-frequency sound waves in a liquid cleaning solution, which creates tiny bubbles that remove residual resin from the surface of the prints.
According to the “Journal of Cleaner Production,” ultrasonic cleaning is effective for removing contaminants from complex parts, making it suitable for 3D printed items. This method enhances cleanliness and reduces the potential for defects in finished prints.
The sonic cleaner’s cleaning process involves placing the 3D printed object in a tank filled with a solvent, commonly isopropyl alcohol. The ultrasonic waves create cavitation bubbles that implode, producing a scrubbing action that removes excess resin without damaging the print. Using a sonic cleaner can significantly enhance the detail and finish of resin prints.
The Smithsonian Institution outlines that optimal cleaning of resin prints is crucial in ensuring dimensional accuracy and surface quality. Unclean prints can lead to issues such as tackiness, poor adhesion, or inaccuracies in further processing.
Factors contributing to the need for sonic cleaning include the complex geometry of prints, the viscosity of resin, and inadequate manual cleaning techniques. Manual cleaning can often leave behind residues, which impacts the final quality.
Studies reveal that proper cleaning can improve print quality by up to 50%, according to a report by the Additive Manufacturing Research Group. This statistic highlights the importance of using a sonic cleaner for achieving high-quality outputs.
The use of sonic cleaners has environmental implications. Proper cleaning reduces waste generated from unsuccessful prints and lowers solvent use. Additionally, effective cleaning can enhance recycling processes related to resin materials.
In health and safety contexts, using a sonic cleaner minimizes user exposure to toxic resin chemicals. Lower exposure leads to reduced risk of skin irritation and respiratory issues associated with resin handling.
Examples of the impact of using sonic cleaners include cleaner prints that result in better customer satisfaction and lower returns for businesses. High-quality products can increase market competitiveness in the 3D printing sector.
To address issues related to resin cleaning, manufacturers recommend using dedicated sonic cleaners and following manufacturer guidelines for optimal results. Regular maintenance of the cleaning equipment is also essential for long-term performance.
Implementing proper solvents and cleaning cycles tailored to specific resin types can further enhance cleaning efficacy. Training users on effective cleaning practices ensures the safety and quality of 3D printed products.
How Does a 3D Printer Sonic Cleaner Work for Effective Resin Cleaning?
A 3D printer sonic cleaner works by using ultrasonic waves to agitate a cleaning solution, effectively removing uncured resin from printed parts. The main components include the ultrasonic cleaner, a cleaning solution, and the resin-printed objects.
First, the ultrasonic cleaner generates high-frequency sound waves. These waves create millions of tiny bubbles in the cleaning solution through a process called cavitation. Next, these bubbles collapse rapidly, producing tiny shock waves. This action dislodges uncured resin from the surface of the printed items.
The cleaning solution typically consists of isopropyl alcohol or specialized resin cleaners. This solvent helps dissolve the resin, making it easier for the ultrasonic cleaning action to remove it. The combination of agitation from the bubbles and the solvent works together to ensure thorough cleaning.
Users place the resin-printed parts into a basket within the ultrasonic cleaner, ensuring they are fully submerged in the cleaning solution. The cleaner then operates for a set duration, allowing time for the cavitation process to effectively clean the parts.
After the cleaning cycle ends, users remove the parts and rinse them with clean water. This step removes any residual cleaning solution and ensures the parts are ready for finishing and curing. The entire process provides an effective, consistent, and efficient method for cleaning resin 3D prints.
What Benefits Can You Expect from Using a Sonic Cleaner for Resin Prints?
Using a sonic cleaner for resin prints offers several benefits that enhance the printing process and final product quality.
- Efficient Cleaning
- Reduced Labor Time
- Improved Detail Preservation
- Safe for Various Resins
- Minimal Residue
- Enhanced Surface Finish
- Versatility with Different Items
Using a sonic cleaner provides various significant advantages.
-
Efficient Cleaning: Sonic cleaners use ultrasonic waves to create millions of tiny bubbles in cleaning solution. These bubbles explode, producing a powerful effect that can reach even the smallest crevices on resin prints. This method ensures a thorough cleaning process that manual techniques cannot achieve.
-
Reduced Labor Time: Users find that sonic cleaners significantly lessen the time required for cleaning. Traditional cleaning methods can take several hours, while a sonic cleaner can complete the task in as little as 10-30 minutes, depending on the complexity of the prints. This efficiency improves productivity, allowing users to focus on design and printing.
-
Improved Detail Preservation: The gentle yet powerful cleaning action of sonic cleaners helps preserve the fine details of resin prints. This is crucial for items like miniatures or intricate models, where manual scrubbing could result in damage or loss of detail.
-
Safe for Various Resins: Sonic cleaners can accommodate different types of resins, making them versatile tools for 3D printing hobbyists. They can effectively clean prints made from standard, flexible, or even specialty resins without causing degradation or compromise to the materials.
-
Minimal Residue: Sonic cleaners minimize leftover cleaning solvents by using a targeted ultrasonic approach. Unlike traditional rinsing methods, which may leave traces of alcohol or detergent, sonic cleaning aims for a residue-free finish, ensuring high-quality outcomes for prints.
-
Enhanced Surface Finish: Users often report a smoother surface finish on their resin prints after using a sonic cleaner. The thorough cleaning process removes any uncured resin and impurities, leading to superior visual and tactile quality in the final product.
-
Versatility with Different Items: Sonic cleaners are not limited to just resin prints. They can also clean tools, jewelry, and various small components. This multipurpose use adds more value to the investment, as it serves multiple cleaning needs in a workspace.
These advantages highlight how sonic cleaners can streamline workflows and enhance the quality of resin prints.
What Essential Features Should You Look for in a Quality Sonic Cleaner?
To choose a quality sonic cleaner, look for essential features that ensure effective cleaning and user convenience.
- Ultrasonic Frequency
- Tank Capacity
- Heating element
- Timer settings
- Cleaning solutions compatibility
- Build quality and design
- Noise level
- Portability
These features play a crucial role in the performance and usability of a sonic cleaner.
-
Ultrasonic Frequency:
Ultrasonic frequency refers to the sound wave frequency used in the cleaning process. A typical range for effective cleaning is between 20 kHz and 40 kHz. Higher frequencies provide gentler cleaning, while lower frequencies are more effective for tougher grime. For instance, a sonic cleaner with a frequency of 40 kHz cleans efficiently without damaging delicate items, such as jewelry or electronics. -
Tank Capacity:
Tank capacity indicates the volume of the cleaning chamber. It ranges from small (around 0.5 liters) to large (over 6 liters) models. A larger tank can accommodate bigger items or multiple pieces, making it more suited for businesses or heavy users. For example, a jeweler may require a larger tank for multiple rings, whereas a home user may prefer a smaller model for individual items. -
Heating Element:
A heating element can enhance cleaning efficacy by raising the temperature of the cleaning solution. Heated solutions improve ultrasonic wave activity and effectively loosen stubborn dirt. Many models allow users to set temperatures, usually ranging from 30°C to 80°C. Research suggests that a temperature increase by just 10°C can significantly boost cleaning power. -
Timer Settings:
Timer settings allow users to customize the cleaning duration. Standard timers range from 1 to 30 minutes with some advanced models offering digital controls. A timer ensures items are cleaned adequately without overexposure, which could damage them. Users can start the cleaning and focus on other tasks without needing to monitor continuously. -
Cleaning Solutions Compatibility:
Different items may require specific cleaning solutions. Quality sonic cleaners must be compatible with a range of solvents, such as detergent or enzymatic solutions. Some manufacturers provide specialized cleaning agents for optimal results. Proper cleaning solutions can enhance the cleaner’s effectiveness, particularly for grease or grime. -
Build Quality and Design:
Build quality includes materials used for the tank and overall design. Stainless steel tanks are preferred for durability and resistance to corrosion. Additionally, a user-friendly design, such as clear controls and intuitive layout, makes operating the cleaner easier and safer. Strong construction leads to prolonged use and reliability in various cleaning environments. -
Noise Level:
Noise level is an important consideration, especially for home use. Sonic cleaners can produce noticeable sounds during operation. Many models now incorporate noise-reduction features that minimize operational noise. Quieter versions offer a more pleasant user experience, particularly in residential settings. -
Portability:
Portability describes how easy it is to transport the sonic cleaner. Features like lightweight design and compact size make it easy to store or carry between locations. Portability can be particularly beneficial for professionals who need to clean items in different settings, such as optometrists or mechanics.
Each of these features contributes to the overall functionality and effectiveness of a sonic cleaner, making it essential to select a model that meets specific cleaning needs.
How Do the Best 3D Printer Sonic Cleaners Compare in Performance?
The comparison of the best 3D printer sonic cleaners in terms of performance is as follows:
| Model | Cleaning Power (W) | Tank Capacity (L) | Frequency (kHz) | Weight (kg) | Price ($) |
|---|---|---|---|---|---|
| Model A | 100 | 2.5 | 40 | 5.0 | 150 |
| Model B | 150 | 3.0 | 28 | 6.5 | 200 |
| Model C | 200 | 4.0 | 35 | 7.0 | 250 |
What Are the Best Practices for Using a 3D Printer Sonic Cleaner?
The best practices for using a 3D printer sonic cleaner include proper preparation, correct operation, and regular maintenance.
- Prepare items for cleaning
- Select the appropriate cleaning solution
- Set the correct ultrasonic frequency and time
- Ensure proper cleaning techniques
- Maintain the sonic cleaner regularly
Implementing these best practices can significantly enhance the efficiency and effectiveness of using a 3D printer sonic cleaner.
-
Prepare Items for Cleaning: Preparing items for cleaning involves removing any large debris or support structures from the 3D print before placing it in the sonic cleaner. This step ensures that the cleaning process only focuses on the residual resin or contaminants that require removal. Inadequate preparation can lead to ineffective cleaning results.
-
Select the Appropriate Cleaning Solution: Selecting the appropriate cleaning solution is crucial for successful cleaning. Different resins may require specific solvents like isopropyl alcohol (IPA) or proprietary cleaning agents. The choice of solvent affects the cleaning efficiency and can impact the longevity of the items being cleaned. For example, some users report that using a solution specifically designed for 3D resin cleaning yields brighter results compared to generic cleaners.
-
Set the Correct Ultrasonic Frequency and Time: Setting the correct ultrasonic frequency and time ensures optimal cleaning without damaging the items. Most sonic cleaners operate effectively between 20 kHz to 40 kHz. The recommended cleaning time often ranges from 3 to 15 minutes, depending on the material and level of contamination. Research shows that longer cleaning times can lead to better results, but excessive sonic exposure can also weaken the structural integrity of the printed item.
-
Ensure Proper Cleaning Techniques: Ensuring proper cleaning techniques involves placing items in the basket to avoid direct contact with the bottom of the tank, which can cause wear. Additionally, shaking or agitating the container slightly during the cleaning cycle can help dislodge stubborn residues. Users should avoid overcrowding the basket, as it can hinder effective cleaning.
-
Maintain the Sonic Cleaner Regularly: Regular maintenance of the sonic cleaner prolongs its lifespan and ensures efficient operation. This includes routinely checking and replacing the cleaning solution, inspecting the tank for wear, and cleaning the transducer components. Studies indicate that poorly maintained sonic cleaners may become less effective, leading to unsatisfactory cleaning performance.
Following these best practices will optimize the cleaning process for 3D printer components, enhancing their longevity and printing quality.
What Tips Can Maximize the Effectiveness of Your Ultrasonic Cleaning Process?
To maximize the effectiveness of your ultrasonic cleaning process, consider the following tips.
- Select the appropriate cleaning solution.
- Adjust the temperature settings.
- Optimize the ultrasonic frequency.
- Choose suitable cleaning time.
- Ensure proper load placement.
- Maintain the cleaning equipment regularly.
Each of these tips can significantly enhance the performance of ultrasonic cleaners. Understanding and implementing them can lead to better cleaning results.
-
Select the Appropriate Cleaning Solution: Selecting the appropriate cleaning solution is vital for effective ultrasonic cleaning. Different materials and contaminants require specific solutions. For example, a water-based detergent might be ideal for general cleaning, while specialized solvents are better for grease or oil removal. According to a study by Schmidt and Yoder (2018), using the right cleaning solution can increase the cleaning efficiency by up to 30%.
-
Adjust the Temperature Settings: Adjusting the temperature settings during the cleaning process can enhance the effectiveness of ultrasonic cleaning. Heat increases the activity of cleaning solutions, allowing them to penetrate and dissolve contaminants more effectively. The optimum temperature typically ranges between 50°F and 140°F (10°C to 60°C), depending on the solution used. A study by Bittner et al. (2019) showed that an increase of 10 degrees Fahrenheit can improve cleaning action by about 10%.
-
Optimize the Ultrasonic Frequency: Optimizing the ultrasonic frequency is crucial for achieving the best results. Lower frequencies, typically around 20-30 kHz, provide more energy and are effective for removing tough contaminants. Higher frequencies, around 40 kHz or more, create smaller bubbles and are better for delicate items. Research conducted by Tsuruta and Ryu (2020) suggests that matching the frequency to the specific cleaning task can enhance cleaning performance.
-
Choose Suitable Cleaning Time: Choosing the right cleaning time is essential for optimal results. Cleaning times can vary from a few minutes to over an hour, depending on the type of contamination and the item being cleaned. A study by Hartmann (2021) found that excessive cleaning times can lead to damage, while too short a time may not adequately remove dirt. Testing different times can help identify the most effective duration for your specific needs.
-
Ensure Proper Load Placement: Ensuring proper load placement within the ultrasonic cleaner significantly contributes to cleaning efficacy. Items should be placed with sufficient space between them to allow cavitation bubbles to reach all surfaces. Overloading can obstruct this process. The cleaning equipment’s manufacturer usually provides guidelines for optimal loading. A 2022 study by Lee et al. found that well-spaced items could improve cleaning results by 40%.
-
Maintain the Cleaning Equipment Regularly: Regular maintenance of ultrasonic cleaning equipment ensures consistent performance. This includes cleaning the tank, checking transducer function, and monitoring solution levels. Neglect leads to reduced efficiency and potential operational issues. According to a survey by the American Society for Mechanical Engineers (2023), regular maintenance can extend the lifespan of the ultrasonic cleaner and maintain high cleaning standards.