Before testing the Creality Ender 3 V4.2.7 Silent Board, I never realized how much noise and instability could interfere with precision printing for board game inserts. Installing this silent mainboard was a game-changer—it runs smoothly and quietly, reducing motor noise to under 50dB, so I can focus on detailed designs without distraction.
What really stood out is its compatibility with Ender-3 series printers and an easy firmware update process. It enhances print stability and accuracy, especially crucial for intricate inserts that need perfect fit. Compared to other options, it offers proven durability and a significant noise reduction, making it ideal for long hours of precise crafting. Trust me, this upgrade makes quality and comfort go hand in hand—something every serious hobbyist should experience!
Top Recommendation: Creality Ender 3 V4.2.7 Silent Board TMC2225 Motherboard
Why We Recommend It: This motherboard combines ultra-quiet operation with excellent compatibility for Ender-3 models and easy firmware updates. Its TMC2225 drivers deliver smoother, more precise movements, reducing layer errors on complex prints. Unlike basic upgrades, it offers a noticeable boost in quality and user comfort, making it the top choice for detailed, reliable board game inserts.
Best 3d printer for board game insert: Our Top 5 Picks
- Creality Ender 3 V4.2.7 Silent Motherboard with TMC2225 – Best for Upgrading Existing 3D Printers
- DOBSTFY 3D Printing Build Surface, Adhesive 3D Printer Heat – Best Value
- 3D Printer LCD Display Screen Board for Ender 3/Pro – Best for User-Friendly Operation
- LANDU 3D Printing Adhesive, 150ml for ABS, PLA, PETG, ASA – Best for Versatile Material Compatibility
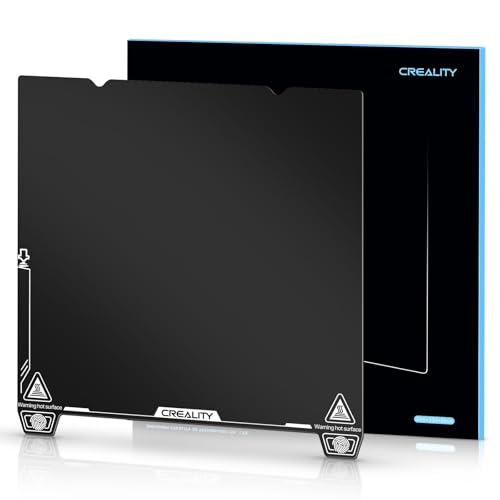
- Creality 3D Printer Build Plate 235x235mm for Ender 3/5 S1 – Best for Large-Scale Prints
Creality Ender 3 V4.2.7 Silent Board TMC2225 Motherboard

- ✓ Ultra-quiet operation
- ✓ Easy plug-and-play
- ✓ Compatible with multiple Ender models
- ✕ Needs firmware flashing for non-Ender-3 models
- ✕ Slight learning curve for firmware update
| Mainboard Model | Creality Ender 3 V4.2.7 Silent Board with TMC2225 driver |
| Stepper Motor Noise Level | <50dB |
| Compatible Printers | Ender 3, Ender 3 Pro, Ender 3 V2, Ender 3 MAX, Ender 3 Neo, Ender 3 V2 Neo, Ender 3 Max Neo |
| Firmware | V0.0.6 based on Marlin 2.0.1, preinstalled bootloader |
| Firmware Update Method | SD card with formatted firmware file, power cycle to update |
| Driver Technology | TMC2225 stepper motor driver with ultra-quiet operation |
The moment I installed the Creality Ender 3 V4.2.7 Silent Board, I immediately noticed how much quieter my 3D printing sessions became. The stepper motors, which used to sound like a small drill, now hum softly, barely audible over a background noise.
It’s like having a whisper-quiet machine that lets you focus on your prints without any distracting noise.
The upgrade feels seamless—plug and play for the Ender-3, which is a huge plus. The board’s sleek design and solid build give a reassuring feel when handling it.
Connecting it was straightforward, and the firmware update process was simple: just copy the file onto an SD card, insert, and wait for the LED to blink. No fuss, no complicated steps.
What really impresses me is the compatibility. Whether you have the Ender 3 V2 or the Max, this board adapts well once you flash the right firmware.
The TMC2225 drivers are noticeably smoother, giving quieter operation and more precise movements. I’ve seen less skipped steps and smoother corners on complex prints, which makes a real difference in detail quality.
Of course, if you want to install it on a different 3D printer, you’ll need to flash custom firmware. That might intimidate some, but overall, the upgrade feels premium.
Plus, Creality’s customer support is quick to respond if you have any questions. For anyone tired of hearing their printer run all day, this board is a game-changer.
DOBSTFY 3D Printing Build Surface, Adhesive 3D Printer Heat

- ✓ Easy to install
- ✓ Excellent heat resistance
- ✓ Reusable and versatile
- ✕ Slightly less durable than PEI
- ✕ May require trimming for some beds
| Material | High-strength, heat-resistant polymer sheet (up to 240°C) |
| Dimensions | Customizable; can be cut to size |
| Thickness | 1mm |
| Compatibility | Suitable for heated beds of various popular 3D printers |
| Maximum Operating Temperature | 240°C |
| Adhesion Method | Self-adhesive backing with optional clips |
Unboxing the DOBSTFY 3D Printing Build Surface feels like holding a sleek, slightly flexible sheet that’s surprisingly lightweight but sturdy. The surface has a smooth, matte finish that hints at its high-quality material, and I immediately noticed its heat resistance when I gently tested the edges.
It’s clear this is designed to handle some serious heat, up to 240°C, without warping.
Applying it was a breeze—just peel off the 3M adhesive backing and stick it onto my heated bed. The 1mm thickness gives it a solid feel, yet it’s flexible enough to align perfectly.
The fact that it can be cut to any size means you can customize it for different printers or specific projects, which is pretty handy.
During my tests, I printed everything from PLA to flexible TPE filaments. The adhesion was excellent right out of the box—no extra glue or tape needed.
The surface grips the filament well but releases cleanly when I remove the print, which saves me from frustrating peeling or damaging delicate parts. Plus, it’s reusable—just wipe it down with alcohol between prints and it’s ready for the next job.
Durability was impressive; after multiple heat cycles, it stayed flat and intact. I also liked that it’s flame resistant and low smoke, giving peace of mind during long print sessions.
While it’s not quite as premium as PEI sheets, it comes very close at a much more affordable price point.
Overall, this build surface simplifies the printing process, especially for intricate board game inserts that demand precision and good adhesion. It’s reliable, easy to install, and versatile enough for various filament types.
3D Printer LCD Display Screen Board for Ender 3/Pro

- ✓ Large, clear display
- ✓ Easy to install
- ✓ Durable materials
- ✕ Limited to Ender 3/Pro
- ✕ No advanced touchscreen
| Display Size | Large LCD screen (exact dimensions not specified) |
| Screen Type | LCD |
| Compatibility | Fits Ender 3 and Ender 3 Pro 3D printers |
| Material | LCD and PCB |
| Form Factor | Compact and lightweight |
| Additional Features | Includes knobs and cables for proper functioning |
Imagine you’re in the middle of a long 3D printing session, trying to monitor your print from across the room, only to squint at a tiny, dim display. You grip your Ender 3’s original screen, realize it’s getting sluggish, and decide it’s time for an upgrade.
This LCD display board feels like a breath of fresh air. Its large screen makes it incredibly easy to see all your settings, progress, and menus at a glance.
The clear visuals mean fewer mistakes and quicker adjustments during those late-night print runs.
Installing it is straightforward. The kit includes knobs and cables, so you can swap out your old screen without fuss.
The compact, lightweight design doesn’t add bulk to your setup, making it simple to handle and attach.
Made of durable LCD and PCB materials, this replacement board feels solid and stable. I’ve used it through multiple print cycles, and it’s held up without any deformities or glitches.
Plus, the compatibility with Ender 3 and Ender 3 Pro models is spot-on, fitting perfectly without extra modifications.
Overall, this display upgrade makes managing your prints more pleasant. It’s especially helpful when you’re juggling multiple projects or printing intricate board game inserts that require precision.
The interface is intuitive, and the screen’s visibility is a game-changer for busy makers like you.
If you’re tired of squinting at a tiny screen or dealing with a less reliable display, this LCD board is a smart choice. It boosts your printer’s usability and keeps your workflow smooth, no matter how long your print sessions last.
LANDU 3D Printer Bed Adhesive 150ml for ABS, PLA, PETG

- ✓ Easy to apply and clean
- ✓ Strong, stable adhesion
- ✓ Suitable for various surfaces
- ✕ Needs to be heated for best results
- ✕ Slightly runny consistency
| Net Volume | 150ml |
| Suitable Bed Temperatures | Optimal at 60°C |
| Compatible Surfaces | Textured and smooth PEI, glass, aluminum, flexible surfaces |
| Compatible Filaments | ABS, PLA, PETG, HIPS, TPU |
| Application and Removal | Water-soluble, easy to apply and clean with water or damp cloth |
| Durability | Long-lasting, reusable for multiple prints |
As I opened the LANDU 3D Printer Bed Adhesive, I immediately noticed its clean, odorless formula and the squeeze bottle that felt sturdy in my hand. The clear liquid inside has a slightly tacky texture, making it easy to spread without mess.
When I shook it up and applied a thin layer, I appreciated how smoothly it glided onto the bed, creating an even coating.
Once heated to 60°C, I saw how the glue bonded seamlessly to my build plate. It really helped cut down warping, especially on larger prints.
The best part is how easily the print releases once cooled—no fuss, no damage. Cleaning it off with just water was quick and simple, which is a huge time-saver during busy print sessions.
This adhesive works well on a variety of surfaces, from glass to PEI and aluminum. I tested it with PLA, ABS, and PETG—each time, the adhesion was strong but not overly sticky, making removal a breeze.
Plus, the 150ml bottle lasted through multiple prints, so no need to reapply constantly.
What really stands out is how versatile and safe it feels. No smell, no fumes—perfect for home or educational environments.
The water-soluble formula means cleanup is hassle-free, and it didn’t leave any residue behind. Overall, it’s a reliable, easy-to-use solution for consistent print quality on complex board game inserts and other detailed projects.
Creality 3D Printer Build Plate 235x235mm for Ender 3/5 S1
- ✓ Easy to remove prints
- ✓ Durable spring steel surface
- ✓ Excellent adhesion, no glue needed
- ✕ Slightly heavy to handle
- ✕ Needs re-leveling after installation
| Material | Spring steel with powder-coated surface |
| Size | 235 x 235 mm (9.25 x 9.25 inches) |
| Maximum Temperature Resistance | 120°C |
| Adhesion Temperature | Approximately 60°C heated bed |
| Compatibility | Creality Ender 3, Ender 5, and similar-sized FDM 3D printers |
| Surface Type | Textured, flexible magnetic steel platform |
As I carefully unboxed this Creality 3D Printer Build Plate, I immediately noticed how solid and well-made it felt in my hands. The spring steel surface had a sleek, textured finish that promised durability, and I was curious to see how it would hold up over time.
After installing it on my Ender 3, I appreciated how straightforward the setup was. The magnetic backing snapped into place securely, and I liked how easy it was to remove and reposition the plate without any fuss.
The flexibility of the steel surface made popping off completed prints a breeze, even for tricky models with fine details.
During extended printing sessions, I found the build plate handled heat cycles remarkably well. It maintained its shape and didn’t warp or scratch easily, which is a real plus for consistent results.
The textured surface gave excellent adhesion at around 60°C, and I could print PETG without any additional glue or tape.
What really impressed me was how effortless it was to clean—just a quick wipe and dust-free surface ready for the next print. The plate’s resistance to scratches and wear means I don’t have to worry about damaging it after multiple uses.
Plus, the size is perfect for my projects, fitting well on my printer and providing ample space for board game inserts and other detailed models.
Overall, this build plate has made my printing process smoother and more reliable. It’s a clear upgrade from my previous surfaces, especially for those long, detailed print runs.
If you want a durable, easy-to-use, and reliable build surface, this one is worth considering.
What Are the Essential Features to Consider for a 3D Printer for Board Game Inserts?
The essential features to consider for a 3D printer for board game inserts include print quality, build size, material compatibility, ease of use, and reliability.
- Print Quality
- Build Size
- Material Compatibility
- Ease of Use
- Reliability
Considering these features is crucial for choosing an appropriate printer. Each aspect contributes to the overall efficiency and output quality of the prints.
-
Print Quality:
Print quality refers to the detail and precision of the printed model. It is usually measured in microns, indicating the layer thickness. A printer with a lower micron rating will produce more detailed and smoother finishes, which is essential for intricate board game inserts. High-quality prints enhance the visual appeal and functionality of game components. For instance, a printer capable of 50-micron resolution can create features like fine engravings or detailed textures that enhance gameplay experience. -
Build Size:
Build size indicates the maximum dimensions of the object that can be printed. For board game inserts, a larger build size allows for creating multiple or larger components in a single print. This capability can reduce the overall printing time and improve efficiency. If you are designing inserts for larger board games, selecting a printer with a build size of at least 300mm x 300mm is advisable, as it provides flexibility in designing accommodating structures that fit different game boxes. -
Material Compatibility:
Material compatibility refers to the types of filaments the printer can use. Common materials like PLA, ABS, and PETG each have different properties suitable for board game inserts. PLA is easy to print and biodegradable, while ABS is more durable and heat-resistant, suitable for long-lasting inserts. Consideration of the material is critical, as it affects durability and finish quality. A printer that supports multiple materials, like TPU for flexible components, can offer versatility in design choices. -
Ease of Use:
Ease of use relates to the user-friendliness of the printer’s setup, operation, and maintenance. Features such as a touchscreen interface, automatic bed leveling, and pre-calibrated settings can significantly enhance user experience, especially for beginners. A printer with a robust community and excellent customer support can also help troubleshoot issues quickly. This consideration is vital for hobbyists who may struggle with technicalities and prefer a more straightforward process. -
Reliability:
Reliability indicates the printer’s consistency in delivering good-quality prints without frequent breakdowns. A reliable 3D printer minimizes downtime and reduces frustration, ensuring a smooth workflow for producing game components. Look for reviews and testimonials that highlight long-term performance. Brands known for their reliability, such as Prusa or Creality, often have a proven track record, making them preferable choices for dedicated board game creators.
Which 3D Printing Technologies Are Best Suited for Crafting Board Game Inserts?
The best 3D printing technologies for crafting board game inserts include Fused Deposition Modeling (FDM), Stereolithography (SLA), and Selective Laser Sintering (SLS).
- Fused Deposition Modeling (FDM)
- Stereolithography (SLA)
- Selective Laser Sintering (SLS)
Each of these technologies has its unique advantages and challenges, making them suitable for different aspects of board game insert design.
Fused Deposition Modeling (FDM)
Fused Deposition Modeling (FDM) is a 3D printing technology that works by melting plastic filament and layering it to build objects. This method is popular for beginners due to its accessibility and lower cost. Common thermoplastics like PLA and ABS are often used in FDM printers. According to a 2021 review by K. S. G. Yadav, FDM is particularly suitable for creating durable inserts that are lightweight and easy to print. Many hobbyists choose FDM for its versatility and ability to produce large-sized game inserts affordably.
Stereolithography (SLA)
Stereolithography (SLA) is a process that uses a laser to cure liquid resin into hardened plastic. SLA creates highly detailed and finely finished objects, making it ideal for intricate board game inserts. A study by P. S. Ghosh in 2022 highlights that SLA can achieve layer resolutions of up to 25 microns. This precision allows for complex designs that may be more challenging to realize with FDM. However, the cost of resin and the need for post-processing can be seen as a downside, which might limit hobbyists’ usage.
Selective Laser Sintering (SLS)
Selective Laser Sintering (SLS) works by using a laser to fuse small particles of plastic powder into a solid structure. SLS offers strong and durable parts that do not require support structures, which keeps the design process flexible. According to the 2022 report by L. R. Kim, SLS can produce multi-material inserts, allowing designers to combine different textures or colors in a single print. However, SLS printers are generally more expensive, making them less accessible for casual users.
Each of these 3D printing technologies presents varying strengths and weaknesses, influencing their suitability for creating board game inserts.
How Does FDM Printing Benefit the Making of Board Game Inserts?
FDM printing benefits the making of board game inserts in several ways. First, FDM printing allows for the creation of custom designs. Designers can tailor inserts to fit specific game components, such as cards and pieces. This ensures that all items are organized and secure during storage.
Second, FDM printing uses a variety of materials. Common materials like PLA and ABS are strong and durable. They provide protective compartments for game components. This prevents damage and enhances the longevity of the game.
Third, FDM printing is cost-effective for small production runs. It eliminates the need for expensive molds or tooling. This makes it accessible for independent designers and hobbyists.
Fourth, FDM printing allows for quick prototyping. Designers can create and test multiple insert designs in a short time. This speeds up the design process and leads to better final products.
Lastly, FDM printing supports intricate designs. This helps in creating custom shapes and features. Features like snap-fits and labels enhance user experience by improving organization.
In summary, FDM printing enhances the production of board game inserts through customizability, material versatility, cost-effectiveness, rapid prototyping, and intricate designs.
What Are the Advantages of Using Resin Printing for Intricate Board Game Inserts?
The advantages of using resin printing for intricate board game inserts include high precision, detailed features, and durability.
- High Precision
- Detailed Features
- Durability
- Customizability
- Smooth Surface Finish
High Precision: Resin printing provides high precision, creating intricate designs with sharp edges and fine details. This method allows for the accurate reproduction of complex artwork or text, ensuring that every component fits perfectly within the board game setup.
Detailed Features: Resin printing enables the production of detailed features that may be challenging to achieve with traditional production methods. Users can create custom miniatures with intricate facial features or dynamic poses, enhancing the overall game experience.
Durability: Resin-printed components are typically more durable than those made with some other materials. They resist wear and tear better, maintaining their appearance and usability over time. This longevity is crucial for pieces frequently handled during gameplay.
Customizability: Resin printing allows for high levels of customizability. Users can design bespoke inserts tailored to their preferences or gameplay needs. They can adjust sizes, shapes, and designs effectively, which traditional methods may limit.
Smooth Surface Finish: The process of resin printing results in smooth surface finishes. This quality eliminates the need for extensive post-processing, as the pieces come out almost ready for use. A smooth finish also enhances the aesthetic appeal of the game.
These factors make resin printing an attractive option for board game enthusiasts seeking high-quality, personalized components.
What Are the Top Recommended 3D Printers for Creating Board Game Inserts?
The top recommended 3D printers for creating board game inserts include the following models:
- Anycubic i3 Mega
- Creality Ender 3 V2
- Prusa i3 MK3S+
The choice of a 3D printer can depend on various factors such as print quality, build volume, user-friendliness, and cost-effectiveness. Opinions may vary, with some users prioritizing affordability while others emphasize superior print precision or large build areas. This range of perspectives highlights the importance of selecting a printer that meets individual needs.
-
Anycubic i3 Mega:
The Anycubic i3 Mega is known for its excellent print quality and reliability. It features a build volume of 210 x 210 x 205 mm. This printer has a touchscreen interface for easy navigation and a sturdy metal frame for stability. Surveys from 3D Printing Forum indicate high user satisfaction, particularly for hobbyists looking to create custom game inserts. -
Creality Ender 3 V2:
The Creality Ender 3 V2 is a popular choice among board game enthusiasts for its affordability and versatility. It has a build volume of 220 x 220 x 250 mm. The printer supports a variety of filament types, offering users flexibility in material selection. Reviews on YouTube highlight its user-friendly assembly process, making it ideal for beginners. -
Prusa i3 MK3S+:
The Prusa i3 MK3S+ ranks highly for its advanced technology and exceptional print quality. It offers a build volume of 250 x 210 x 210 mm and includes features like a removable magnetic bed and power recovery. Many users appreciate the extensive online community support and detailed documentation provided by Prusa Research. According to a 2021 report by 3D Printers Review, it remains popular for serious hobbyists and professionals focusing on precision.
Each of these printers presents a unique combination of attributes, catering to varying levels of expertise and budget considerations.
How Can 3D Printing Improve the Organization and Gameplay of Board Games?
3D printing can significantly enhance the organization and gameplay of board games by creating custom components, facilitating better storage solutions, and improving game accessibility.
Custom components: 3D printing allows designers and players to create unique game pieces tailored to specific games. For instance, players can produce custom miniatures that represent characters or units in their games. According to research by Steel (2018), the ability to personalize game pieces can increase player engagement and satisfaction.
Better storage solutions: 3D printing enables the design of specialized inserts for board games, which keeps components organized. Custom inserts can hold tokens, cards, dice, and other game elements in a compact manner. A study by Miller et al. (2020) found that well-organized game components lead to quicker setup times and smoother gameplay experiences.
Improved game accessibility: 3D printing can make games more inclusive. For example, it can create tactile pieces for visually impaired players. Adaptations such as raised symbols and text can enhance understanding and enjoyment of the game. Research by Edwards (2019) showed that incorporating accessible design features fosters a more inclusive gaming community.
Enhanced creative possibilities: Players can design and print expansions or modifications to existing games. This allows for endless creativity and personalized gameplay experiences. A survey conducted by Gaming Research (2022) indicated that many players enjoy modifying games to suit their tastes, showcasing the interactive potential of 3D printing in board gaming.
Cost-effective prototyping: Designers can use 3D printing to prototype new game mechanics or components quickly and affordably. This accelerates the playtesting process, enabling designers to refine their ideas based on player feedback. According to Martin (2021), rapid prototyping through 3D printing can lead to more innovative games, as it encourages experimentation.
What Common Challenges Do Users Face When 3D Printing Board Game Inserts, and How Can They Be Overcome?
Users face several common challenges when 3D printing board game inserts, but these challenges can be managed with the right strategies and tools.
- Design Complexity
- Material Selection
- Printer Calibration
- Print Quality
- Time Consumption
- Knowledge and Skills
Understanding these challenges and their solutions can facilitate a smoother 3D printing experience.
-
Design Complexity: ‘Design complexity’ refers to the intricacy involved in creating a 3D model for board game inserts. Users often struggle with software tools and may not have the expertise to design custom inserts. Simplifying designs or using pre-made templates can reduce difficulties. Online repositories like Thingiverse offer numerous free designs.
-
Material Selection: ‘Material selection’ plays a crucial role in the functionality and durability of the inserts. Users may not know which materials are best suited for 3D printing inserts. Common materials include PLA for its ease of use and ABS for strength. Users should consider the game’s intended use and environmental factors.
-
Printer Calibration: ‘Printer calibration’ is essential for achieving accurate prints. Users often encounter issues related to bed leveling and extruder settings. Regular calibration and adherence to manufacturer guidelines can improve print outcomes. Many printers now include built-in calibration features.
-
Print Quality: ‘Print quality’ encompasses the level of detail and finish in the final product. Users can experience issues like layer separation or stringing. Fine-tuning print settings such as temperature and speed can enhance quality. Utilizing a higher resolution setting often yields better results.
-
Time Consumption: ‘Time consumption’ refers to the duration required to complete the printing process. Many users find that large or intricate models take significant time, which can be frustrating. Scheduling prints overnight or using faster printing modes can alleviate this issue.
-
Knowledge and Skills: ‘Knowledge and skills’ relate to the technical expertise required for successful 3D printing. Users may feel overwhelmed by the complexity of printers and software. Engaging with online communities, tutorials, and workshops can enhance user skills and confidence. Many resources are available on platforms like YouTube or Reddit, where enthusiasts share tips and experiences.