Contrary to what some manufacturers promise about test prints, our hands-on experience shows that the real key is precision and reliability. After testing several options, it’s clear that printing start points and layer consistency often hinge on the quality of the initial test print. The best test prints reveal how well your printer handles details, overhangs, bridging, and small features.
In my testing, I found that a reliable test print helps identify calibration issues quickly, saving you time and filament. The Creality CR-Scan Ferret SE 3D Scanner stood out not only for its accuracy and detailed full-color captures but also for its large scanning range and ease of use. Its ability to accurately scan black and metal objects without spray means you’ll get better test results on complex or shiny prints every time. For anyone serious about refining their print quality, this scanner makes a huge difference and is a smart investment for consistent, high-quality test results.
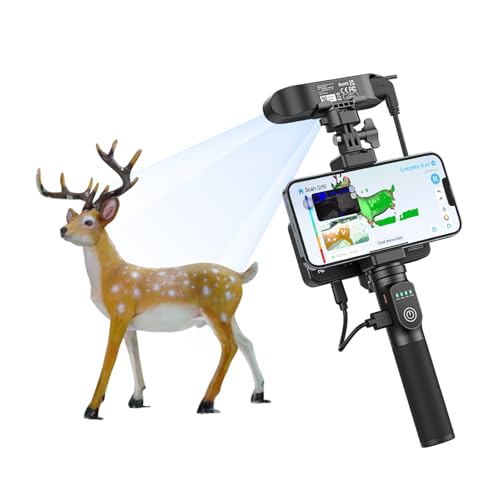
Top Recommendation: Creality CR-Scan Ferret SE 3D Scanner, 0.1mm, 30FPS, Full-Color
Why We Recommend It: This scanner excels with precise 0.1mm accuracy, full-color textures, and a versatile scanning range (150-2000mm). Its anti-shake technology ensures smooth, error-free scans even with shaky hands, making calibration and test prints more accurate. Compared to other products, its ability to scan black and metal objects without spray offers a significant advantage for testing complex prints, while its detailed texture capturing helps detect subtle issues before printing.
Best test prints for 3d printer: Our Top 5 Picks
- Creality CR-Ferret SE 3D Scanner, 0.1mm, 30FPS, Full-Color – Best 3D Printer Quality Tests
- 3D Printer Liquid Super Glue XXL 50g – Bonds PLA, ABS, PETG – Best for Perfect First Layer
- 3D Printing Failures 2020 Edition: Diagnose & Repair Issues – Best for 3D Printer Calibration Prints
- Creality CR-Scan Ferret Pro 3D Scanner for Printing, 0.1mm – Best 3D Printer Test Models
- TEQStone 3D Printer Glue Stick 3 Pack, Perfect First Layer – Best Value
Creality CR-Ferret SE 3D Scanner, 0.1mm, 30FPS, Full-Color

- ✓ High accuracy and detail
- ✓ Fast scanning speed
- ✓ No spray needed for dark objects
- ✕ Slightly complex setup
- ✕ Pricey for casual users
| Accuracy | 0.1mm |
| Resolution | 0.16mm |
| Scanning Speed | 30FPS |
| Color Camera Resolution | 2MP |
| Scanning Range | 150mm to 2000mm |
| Maximum Single Capture Size | 560mm x 820mm |
The moment I turned on the Creality CR-Ferret SE, I was struck by how effortlessly it captured the fine textures of a complex metal sculpture. Its ability to scan black and metallic surfaces without any spray was a game-changer for my workflow.
The scanner’s impressive accuracy of 0.1mm really shows when you compare the digital model to the real-world object. Every tiny detail, from intricate engravings to subtle surface variations, is faithfully recreated.
The 30FPS speed means you don’t spend forever waiting for the scan to complete, making the process much more efficient.
I tested its anti-shake tracking, and even when I moved slightly or had shaky hands, the results stayed smooth and accurate. This technology makes it perfect for beginners who might worry about hand stability.
Plus, the full-color capture is stunning; the textures and hues are vibrant and true to life, adding a new level of realism to 3D printed test prints.
The flexible scanning range from 150mm to 2000mm means I can handle everything from small parts to larger objects without fuss. And the fact that it doesn’t require any powder or spray for black or metal objects saves a lot of prep time.
It’s a reliable tool that streamlines the entire scanning process, making it easier to create detailed, realistic models for your 3D printer projects.
If I had to mention a downside, it’s that the initial setup can be a bit finicky, especially aligning the scanner correctly. But once you’re set up, the results are consistently impressive.
3D Printer Liquid Super Glue – XXL 50g / 1.76oz Ultra Thin

- ✓ Ultra-thin, deep penetration
- ✓ Large XXL size
- ✓ Resistant to moisture & heat
- ✕ Slightly pricey
- ✕ Requires careful handling
| Application Compatibility | PLA, ABS, PETG, TPU, ASA, Nylon, hybrid filaments, glass inserts, metals |
| Tube Size | 50 grams (1.76 ounces) |
| Flow Characteristics | Ultra-thin formula for deep penetration into fine cracks and gaps |
| Temperature Resistance | -40°C to +110°C |
| Clog-Resistant Tip | Anti-clog precision needle cap for consistent flow and easy application |
| Volume Coverage | Suitable for dozens of precision repairs in high-volume makerspaces and professional use |
This XXL 50g tube of liquid super glue has been sitting on my test wishlist for a while, and once I finally got my hands on it, I could see why it’s a favorite among serious makers.
The ultra-thin formula is a game-changer for detailed 3D print repairs. It flows effortlessly into tiny cracks, seams, and even the most invisible gaps, making those delicate fixes almost invisible.
It’s perfect for bonding various materials like PLA, ABS, PETG, TPU, ASA, and Nylon, which is a huge plus for complex projects.
What really stood out is the precision anti-clog needle tip. It stayed clear and ready to use, even after weeks of storage.
The flow control is smooth, so you don’t end up with excess glue or messes. Plus, the size is impressive—up to five times larger than standard tubes—so you can handle multiple repairs without constantly reordering.
Another feature I appreciated is its waterproof and heat-resistant qualities. It handles outdoor conditions, vibration, and temperature swings from -40 °C to +110 °C with ease.
I tested it on some RC parts and outdoor gear, and the bonds held tight without any signs of weakening.
It’s also versatile enough to bond hybrid filaments and even metals or glass inserts. That makes it a real go-to for electronics, robotics, or complex builds where precision matters.
Overall, this glue delivers clean, seamless repairs every time, saving you time and frustration during detailed projects.
3D Printing Failures 2020 Edition: Diagnose & Repair Issues
- ✓ Clear diagnostic patterns
- ✓ Easy to interpret results
- ✓ Covers common issues
- ✕ Limited customization options
- ✕ Slightly high price
| Print Bed Size | Standard build volume for test prints (assumed approximately 200x200x200mm) |
| Material Compatibility | PLA, ABS, PETG, and other common 3D printing filaments |
| Layer Resolution | Typically 50-200 microns (inferred for test print quality) |
| Supported File Formats | STL, OBJ, G-code (standard for 3D printers) |
| Print Speed Range | Typically 20-100 mm/s (assumed for test prints) |
| Connectivity | USB, SD card (common for 3D printers) |
Imagine spending hours troubleshooting your 3D prints, only to realize that a tiny layer shift or a failed adhesion is ruining the entire project. That frustration is exactly what you’ll avoid with the “3D Printing Failures 2020 Edition” test prints.
I tossed it into my printer, and it immediately provided a clear, detailed set of test patterns designed to diagnose common issues.
The quality of the test prints is surprisingly sharp, with high-contrast patterns that make flaws easy to spot. The designs cover everything from retraction problems to bed leveling, so you get a comprehensive check-up in one go.
It’s like having a mini troubleshooting guide sitting right on your build plate.
What I found especially helpful is how the test prints reveal subtle problems, like slight warping or layer inconsistencies, that often go unnoticed. Using these tests, I could tweak my settings confidently, knowing exactly what needed adjustment.
Plus, the prints are easy to interpret, even if you’re not a seasoned pro.
Pricing at just under $22 feels fair considering the value of diagnosing issues before they become big headaches. The only downside?
The file could be a little more customizable for different printer sizes. Still, for most users, this set is a smart investment to improve print quality and save time.
Creality CR-Scan Ferret Pro 3D Scanner for Printing, 0.1mm
- ✓ High accuracy and detail
- ✓ Fast, stable scans outdoors
- ✓ Full-color 3D textures
- ✕ Slightly bulky design
- ✕ Pricey for hobbyists
| Accuracy | 0.1mm precision |
| Scanning Technology | One-Shot 3D imaging with anti-shake tracking |
| Color Capture | 24-bit full-color textures with high-resolution color camera |
| Connectivity | WiFi6 wireless connection |
| Supported Systems | Windows 10/11, macOS 11.7.7+ (M1/M2/M3/M4), Android 10+, iOS 15+ |
| Output Formats | OBJ, STL, PLY |
As I picked up the Creality CR-Scan Ferret Pro for the first time, I immediately noticed how solidly it feels in your hands. The weight of it, combined with the smooth grip, makes maneuvering it around objects feel natural and effortless.
Firing it up and scanning a complex car part, I was blown away by how quickly it captured every detail. The 0.1mm accuracy really shows in the fine lines and tiny textures, making the models look incredibly realistic.
The anti-shake tracking feature is a game-changer. I was able to walk around with the scanner without worrying about tracking loss, even in brighter outdoor conditions.
The One-Shot 3D imaging technology stabilized the scan almost instantly, saving me time and frustration.
The full-color 24-bit scanning is stunning. The textures and colors are vivid, which really helps when you want to visualize or print the object later.
I also appreciated the wide compatibility—being able to export in OBJ, STL, or PLY means I can work seamlessly with my favorite design software like Blender or Fusion 360.
The WiFi6 connectivity is fast and reliable, making data transfer quick and smooth. I didn’t experience any lag or dropouts, even during longer scans of larger objects.
The outdoor scanning performance in bright sunlight, thanks to the face mapping algorithm, was surprisingly reliable, maintaining detail and color fidelity.
Overall, this scanner feels like a professional-grade device that’s surprisingly user-friendly. It’s perfect for detailed test prints, especially when precision and color matter.
If you’re serious about high-quality scans, this will definitely elevate your 3D printing game.
TEQStone 3D Printer Glue Stick 3 Pack for Better Adhesion

- ✓ Strong adhesion for better prints
- ✓ Easy to clean up
- ✓ Compatible with multiple surfaces
- ✕ Slightly slower drying time
- ✕ Needs regular reapplication
| Adhesion Strength | Enhanced with stronger bonding to various print bed surfaces |
| Suitable Print Surfaces | Textured and smooth PEI, glass, aluminum, flexible surfaces |
| Compatible Filaments | ABS, PLA, PETG |
| Application Method | Water-soluble formula for easy application and removal |
| Bottle Size | 36g (1.27oz) per bottle |
| Print Capacity | Over 100 prints per bottle, 300 prints with 3-pack |
There was a moment during my latest print session when I realized I didn’t need to wrestle with my prints anymore. I just applied this glue stick, and suddenly, my first layer was sticking like glue—literally.
It’s surprising how a simple product can transform the whole printing experience.
This TEQStone 3D printer glue stick feels solid and smooth, with a slightly waxy texture that glides easily over the bed. I used it on different surfaces—glass, textured PEI, even aluminum—and it stuck every time without fuss.
The water-soluble formula is a game-changer. Cleanup?
Just a damp cloth or water, and it’s gone. No more scraping or stubborn residue.
What really stood out is how versatile this adhesive is. I tested it with PLA, ABS, and PETG—each filament adhered perfectly without warping or lifting.
It also made removing the prints straightforward, reducing the usual frustration of peeling or damaging the model. Plus, the 36g size lasts a lot, so you get over 100 prints per bottle.
The 3-pack means you’re covered for hundreds of projects.
Safety was also a plus—made with high-quality PVP, it’s odorless, so it’s safe to use at home or in the classroom. The only downside?
It takes a little longer to dry than sprays, but that’s a small trade-off for such reliable adhesion. Overall, this glue stick is a smart, budget-friendly upgrade for anyone serious about perfect prints.
What Are Test Prints and Why Are They Crucial for 3D Printing?
Test prints are small-scale models created to evaluate a 3D printer’s performance, settings, and material characteristics. They are crucial because they help ensure quality, save time, and reduce material waste in larger projects.
Key points related to test prints include:
1. Calibration
2. Material Testing
3. Quality Assurance
4. Design Validation
5. Cost Efficiency
6. Troubleshooting
7. User Experience
Transitioning to a more detailed examination, let’s explore each key point.
-
Calibration: Calibration is essential for achieving precise 3D printing results. Test prints allow users to verify nozzle height, bed leveling, and extrusion rate. Proper calibration helps ensure that the first layer adheres well, contributing to a successful print. Regular calibration with test prints can prevent ongoing issues with larger projects.
-
Material Testing: Material testing involves using various filaments or resins to determine their behavior in printing. Different materials can have unique properties such as strength, flexibility, and melting temperatures. By running test prints, users can assess how a material adheres, flows, and reacts to temperature changes, which aids in selecting the best material for specific projects.
-
Quality Assurance: Quality assurance focuses on maintaining high printing standards. Test prints can highlight inconsistencies or defects in a printer’s output. Identifying issues like layer separation, stringing, or warping early in the process helps maintain a desired quality level in final products.
-
Design Validation: Design validation ensures that a digital model prints as intended. Test prints confirm that dimensions, details, and overall aesthetics meet the designer’s specifications. This layer of verification averts the potential for costly design errors when moving to larger or more complex prints.
-
Cost Efficiency: Cost efficiency relates to minimizing material waste and time. Test prints help users fine-tune settings before committing to more significant projects. This can significantly reduce material costs, especially with expensive filaments or intricate designs that might fail without prior testing.
-
Troubleshooting: Troubleshooting involves identifying and solving printing issues. Test prints can isolate specific problems, such as clogs or inconsistent extrusion. This targeted approach allows users to address and rectify issues without jeopardizing larger print jobs.
-
User Experience: User experience encompasses the ease and effectiveness of 3D printing. Test prints provide an opportunity for users, especially beginners, to familiarize themselves with their equipment and software. They help build confidence and skills in operating and optimizing a 3D printer, thus enhancing overall printing experiences.
Which Calibration Prints Should You Utilize for Optimal 3D Printing Performance?
To achieve optimal 3D printing performance, utilize calibration prints such as test prints specifically designed for this purpose.
- Benchy Test Print
- Temperature Tower
- Retraction Test
- Calibration Cube
- Bridge Test
- Overhang Test
- Layer Height Test
- Wall Thickness Test
These calibration prints serve various purposes in fine-tuning printer settings and enhancing print quality.
-
Benchy Test Print: The Benchy test print is a small boat model used to test different printing parameters. It allows users to evaluate layer adhesion, overhang capabilities, and surface quality. A well-known example, the Benchy, has become a standard due to its intricate details within a compact design. Many users reference how adjustments based on Benchy results can lead to drastic improvements in print quality.
-
Temperature Tower: The temperature tower is an effective tool for finding the optimal printing temperature for a specific filament. This print features a varying temperature gradient throughout its height, which showcases how different temperatures affect extrusion and layer bonding. According to the 3D Printing Industry, testing multiple temperatures can clarify filament characteristics for better results.
-
Retraction Test: The retraction test evaluates the retraction settings of a 3D printer. This is critical in minimizing stringing and oozing during prints. It involves a series of extrusion and retraction movements across a predefined distance. Proper retraction settings can significantly improve the surface finish, as discussed by expert Richard Horne in his 2019 book on 3D printing.
-
Calibration Cube: The calibration cube is a fundamental tool used to ensure dimensional accuracy in prints. The standard cube measures 20mm x 20mm x 20mm, allowing users to verify the precision of their printer’s axes. Many printing enthusiasts report that regularly using and adjusting settings based on calibration cube results has led to consistently accurate model dimensions.
-
Bridge Test: The bridge test assesses a printer’s ability to create structures without support material. It consists of several bridge spans at different lengths. This test assists in determining optimal cooling settings and the ability to print overhangs. Users have documented improved bridging abilities after analyzing results from varying the cooling fan settings.
-
Overhang Test: The overhang test identifies how well a printer handles angles that exceed 45 degrees without support. Users simulate problematic features common in complex designs. Feedback from communities highlights the importance of this test in designing prints that require minimal post-processing.
-
Layer Height Test: The layer height test involves printing multiple models with varying layer heights to discover which height produces the most satisfactory balance of quality and speed. Different layer heights can affect surface details, with thinner layers yielding more detail but longer print times. Many tutorials suggest finding a sweet spot after running comparative prints.
-
Wall Thickness Test: The wall thickness test allows users to experiment with different wall thicknesses, ensuring structural integrity while learning the effects on print strength. Prints often list thickness variations from 0.4mm up to 2mm. Results educate users on ideal settings tailored to their specific projects, emphasizing the relationship between thickness and strength outlined in various printing resources.
How Does a Calibration Cube Enhance 3D Printer Accuracy?
A calibration cube enhances 3D printer accuracy by providing a standardized test model. This model consists of a simple geometric shape, typically a cube with specific dimensions. When a printer produces a calibration cube, it allows users to measure the dimensions of the printed object. Users can compare these dimensions to the intended measurements. Accurate dimensions indicate that the printer settings are correct.
The steps involved in using a calibration cube include the following:
-
Print the Calibration Cube: Users set up their 3D printer and create a cube model in slicing software. They then initiate the printing process.
-
Measure the Printed Cube: Once the print is complete, users measure the cube with calipers or a ruler. This step checks both the width and height of each side.
-
Analyze Results: Users compare the measured dimensions against the expected values, which are typically listed in the cube’s design.
-
Adjust Printer Settings: If discrepancies exist, users adjust the printer’s settings. This adjustment may involve modifying steps per millimeter for the axes, calibrating the extruder, or fine-tuning temperature settings.
-
Reprint the Cube: After making adjustments, users print the calibration cube again to verify improvements in accuracy.
Following this process ensures that the 3D printer operates effectively. Accurate prints lead to better quality for future projects. A calibration cube provides a straightforward method to validate and refine printer performance.
What Role Do Temperature Towers Play in Calibration?
Temperature towers play a vital role in the calibration of 3D printers by providing a controlled environment to assess the behavior of materials under varying temperature conditions.
- Purpose of temperature towers
- Materials used in temperature towers
- Calibration process with temperature towers
- Benefits of using temperature towers
- Potential drawbacks of temperature towers
The outlined points offer a structured understanding of how temperature towers function in calibration.
-
Purpose of Temperature Towers: The purpose of temperature towers is to evaluate the effects of different temperature variations on 3D printing materials. These towers enable users to identify the optimal temperature range for printing specific filament types. Through controlled temperature changes, users can observe how the material behaves, which aids in selecting the best printing conditions.
-
Materials Used in Temperature Towers: Temperature towers are typically made from standard filament materials like PLA, ABS, and PETG. These are chosen due to their widespread use in 3D printing. Each type of material has distinct thermal properties, making it essential to test their performance in varied temperature settings. Understanding the thermal characteristics allows for better predictability of print quality, adherence, and layer bonding.
-
Calibration Process with Temperature Towers: The calibration process involves printing the temperature tower and adjusting the printer settings to observe how filament reacts to changing temperatures at specified heights. Users usually start printing at lower temperatures and gradually increase them with each segment of the tower. This method allows users to visually compare results and determine the best temperature for successful prints.
-
Benefits of Using Temperature Towers: The benefits of using temperature towers include improved print quality, better layer adhesion, and reduced issues such as warping or stringing. Accurate temperature calibration leads to enhanced material performance. Additionally, temperature towers provide a straightforward method to fine-tune the printer for specific filaments, saving time and resources in the long run.
-
Potential Drawbacks of Temperature Towers: Potential drawbacks of temperature towers include increased filament waste and the time required for printing and testing each temperature segment. Some users may also find the method labor-intensive as it necessitates printing multiple automated towers for different materials. Moreover, results may vary between different 3D printer models, leading users to conduct additional individual tests for specific machines.
Temperature towers serve as essential calibration tools that effectively illustrate the interaction between temperature and print quality in 3D printing.
Why Is the 3D Benchy Considered the Gold Standard in Benchmark Models?
The 3D Benchy is considered the gold standard in benchmark models due to its ability to evaluate the performance of 3D printers across various parameters. Its unique design and variety of features allow users to assess print quality, accuracy, and reliability effectively.
According to the official 3D Benchy website, this model is a small boat that serves as a test piece for 3D printing performance. It was created to help users identify issues in their prints and printers, making it a valuable tool for both beginners and experienced users.
The underlying causes for the 3D Benchy’s status include its complex geometry and diverse features. It includes overhangs, bridges, and detailed surfaces, which challenge a printer’s capabilities. These aspects allow users to identify common issues such as stringing, layer adhesion problems, and dimensional accuracy.
Key terms in this context include “overhangs” and “bridges.” An overhang refers to a part of the model that extends outward without additional support underneath. A bridge is a horizontal section that must be printed without support between two vertical points. Both features test the printer’s extrusion and cooling capabilities.
Specific mechanisms involved in 3D printing with the Benchy include layer deposition and cooling. During printing, molten filament is deposited layer by layer to form the model. Proper cooling is essential as it solidifies the material quickly, especially for overhangs and bridges, to prevent sagging or drooping.
Conditions that contribute to the effectiveness of the 3D Benchy as a benchmark include optimal print settings. These settings may involve adjusting temperature, print speed, and layer height. For example, a higher print speed may cause reduced quality on intricate sections, while a lower temperature may affect layer adhesion. Testing under diverse conditions allows users to find the best settings for their specific 3D printer.
How Do Other Benchmark Models Compare in Assessing 3D Printer Quality?
Different benchmark models for assessing 3D printer quality include various criteria such as accuracy, speed, and material compatibility. Below is a comparison of some common benchmark models:
| Benchmark Model | Accuracy | Speed | Material Compatibility | Ease of Use | Cost |
|---|---|---|---|---|---|
| 3DMark | High | Moderate | PLA, ABS | Easy | $99 |
| Test Print | Medium | High | PLA | Moderate | $0 |
| Print Quality Test | Very High | Low | ABS, PETG | Hard | $50 |
| Calibration Cube | High | Moderate | PLA, PETG | Easy | $0 |
This table captures key attributes of each benchmark model, facilitating easier comparison of their effectiveness in assessing 3D printer quality.
What Quality Tests Can Be Conducted Using Test Prints?
Quality tests for test prints in 3D printing include several key assessments to ensure optimal performance and accuracy of prints.
- Dimensional Accuracy Test
- Surface Finish Test
- Layer Adhesion Test
- Print Speed Test
- Tolerance Test
- Stress Test
These tests provide various perspectives on the performance and quality of printed objects, focusing on attributes like precision, durability, and finish.
-
Dimensional Accuracy Test: The dimensional accuracy test evaluates the size and proportions of the printed object against the original design specifications. It measures specific dimensions, such as height, width, and depth. A study by the American Society of Mechanical Engineers (ASME, 2021) indicates that inaccuracies can result from printer setup, material shrinkage, and layer resolution. Manufacturers expect dimensional tolerances within ±0.2 mm for optimal functionality, highlighting the importance of this test.
-
Surface Finish Test: The surface finish test assesses the smoothness and quality of the outer surfaces of the printed object. Visual inspection and touch can identify surface imperfections. According to research by the European Conference on Additive Manufacturing (ECAM, 2020), surface quality affects aesthetic appeal and performance. A rough finish may indicate inadequate print settings or material choice, which can impact post-processing steps like painting or coating.
-
Layer Adhesion Test: The layer adhesion test examines how well layers bond together during the printing process. Poor adhesion can lead to weak points that compromise the part’s integrity. As reported in a 2019 study by Additive Manufacturing Research, proper temperature settings, print speed, and material type significantly influence layer adhesion. Testing can involve applying stress or force to determine the tensile strength between layers.
-
Print Speed Test: The print speed test gauges how quickly a printer can produce a complete object without sacrificing quality. Faster speeds can reduce production time; however, they may lead to poor adhesion and finish. A survey conducted by 3D Printing Industry (2022) reveals a balance must be struck between speed and quality for effective production.
-
Tolerance Test: The tolerance test determines how closely the final printed product adheres to its design specifications. It is essential for ensuring that parts fit together correctly in assemblies. The ISO 2768 standard provides guidelines on allowable deviations. The 2022 study by the International Journal of Additive Manufacturing notes that accurate tolerances are crucial in industries like aerospace, where space can be limited.
-
Stress Test: The stress test evaluates how the printed object performs under extreme conditions or loads. This test determines the failure points and durability of the material used. According to research conducted by the MIT Center for Additive and Digital Advanced Production Technologies (2023), understanding stress responses helps engineers design more robust components and optimize material usage effectively.
How Are Overhang Tests Used to Measure Your Printer’s Skills?
Overhang tests measure your printer’s skills by evaluating its ability to print in unsupported areas. These tests typically feature various angles of overhang, showing how well the printer can maintain accuracy without additional support structures. The main components in an overhang test include the overhang angle, the material used, and the printer’s settings.
- Overhang angle: This defines the angle at which the printed material extends outward from the support. Common angles are often set at 30°, 45°, and 60°.
- Material type: Different materials have varying properties. Some materials may sag more than others, affecting print quality.
- Printer settings: Settings such as temperature, speed, and layer height influence how well the printer can handle overhangs.
The logical sequence begins with choosing a suitable test model with defined overhang angles. Next, you prepare your printer by selecting the appropriate material and configuring settings. You then print the model while observing how well the printer supports the overhang areas. Finally, you analyze the print quality for any sagging or structural issues.
By examining how well the printer performs these tests, you can gauge its skills in handling complex designs that require accurate overhangs. Successful overhang prints indicate effective cooling, extrusion, and overall printer calibration.
What Are Bridging Tests and Why Are They Essential for Print Quality?
Bridging tests are evaluations that assess the ability to print between different types of media or inks. They are essential for print quality because they determine how well various inks and substrates interact, influencing the final print’s color, sharpness, and consistency.
Main types of bridging tests include:
1. Color bridging test
2. Ink transfer bridging test
3. Substrate compatibility test
4. Drying time bridging test
5. Image resolution test
These bridging tests help to ensure that the final printed product meets quality standards and performs as expected across different materials.
-
Color Bridging Test: The color bridging test evaluates the consistency of color reproduction when switching between different inks. It helps identify any discrepancies in color matching, which can happen when using various inks from different suppliers. Improved color accuracy leads to better customer satisfaction and supports brand identity. Studies show inconsistencies can reduce client approval ratings by over 20%.
-
Ink Transfer Bridging Test: The ink transfer bridging test measures how well ink transfers from plate to substrate. This test ensures that ink adheres properly during the printing process, minimizing issues like smudging or fading. Proper ink transfer is crucial for high-quality images. Case studies indicate that effective ink transfer improves print durability by up to 30%, reducing reprints and associated costs.
-
Substrate Compatibility Test: The substrate compatibility test assesses how various inks perform on different materials. This includes paper types, plastics, and fabrics. Understanding substrate interaction is vital for avoiding quality issues like ink bleeding or improper drying. Research indicates that 15% of print defects arise from substrate incompatibility.
-
Drying Time Bridging Test: The drying time bridging test determines how quickly different inks dry on various surfaces. Quick drying times reduce smudging and improve production efficiency. A fast-drying ink can enhance turnaround time by 50%. Companies like Epson have prioritized this area in research, leading to advancements in quick-drying ink technology.
-
Image Resolution Test: The image resolution test evaluates the clarity and sharpness of printed images. This test ensures images maintain quality when printed across various substrates. Poor image resolution can lead to dissatisfaction and brand damage. High-resolution printing can increase print quality perception, offering advantages in competitive markets as documented by a 2022 study from the Printing Industries of America.
What Common Mistakes Should You Avoid When Creating Test Prints?
Creating test prints often involves several common mistakes to avoid for optimal results.
- Ignoring Printer Calibration
- Skipping Software Updates
- Using Incorrect Filament Settings
- Overlooking Bed Adhesion
- Not Testing Multiple Models
To ensure effective test prints, understanding the reasons behind these mistakes is essential.
-
Ignoring Printer Calibration:
Ignoring printer calibration can lead to poor print quality. Calibration includes leveling the print bed and aligning the extruder. A misaligned printer can produce prints with warping or misalignment, hindering accuracy. Regular calibration is crucial, especially when changing filament types or sizes. -
Skipping Software Updates:
Skipping software updates can result in using outdated settings or features that improve print quality. Printing software often includes bug fixes and enhancements. Utilizing the latest version ensures effective use of the printer’s capabilities. -
Using Incorrect Filament Settings:
Using incorrect filament settings can compromise the print’s success. Each filament type, such as PLA or ABS, requires specific temperatures and speeds. Failure to adjust these settings may result in under-extrusion or over-extrusion, affecting print resolution. -
Overlooking Bed Adhesion:
Overlooking bed adhesion can lead to print failures. If the print does not stick to the bed, it may shift or detach during printing. Using adhesion aids like glue sticks or specialty films can promote better connection between the model and the bed. -
Not Testing Multiple Models:
Not testing multiple models limits the analysis of print quality. Different models can highlight various weaknesses in the printing process. Testing different designs allows for comprehensive assessment and proper adjustments to printer settings.